Norms Restoration - 31 Seater Projects |
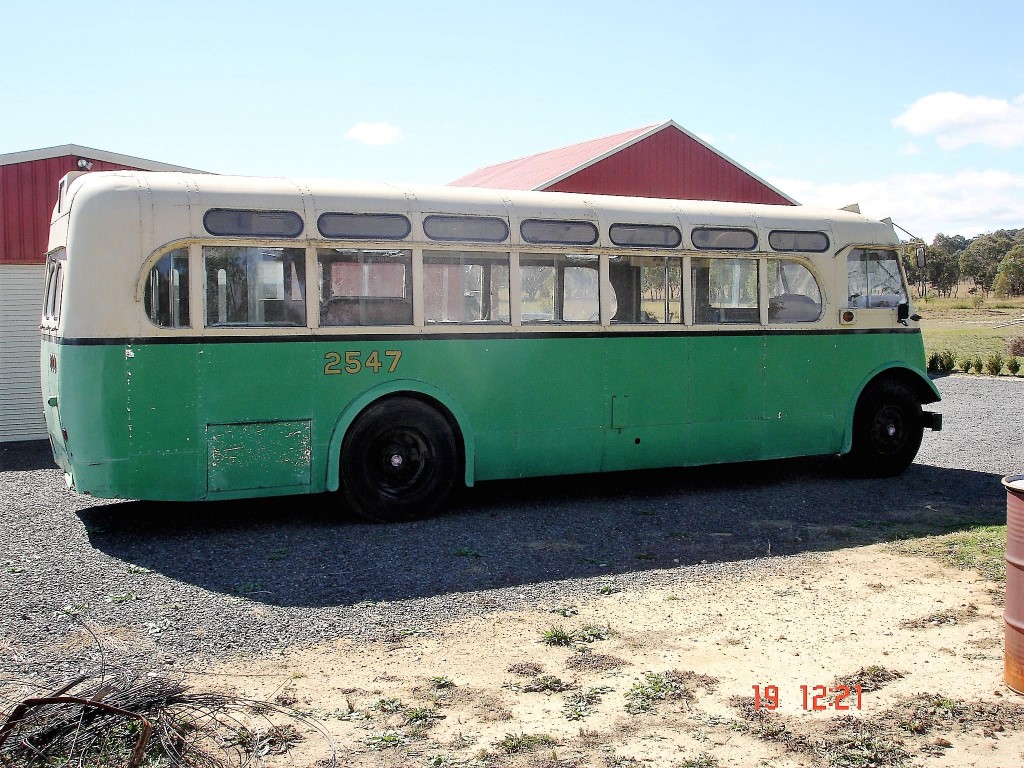
1952 AEC Regal III [2547]
2017
January Body
- 1 Jan 2017
- After a long brake I resumed working on the bus itself.
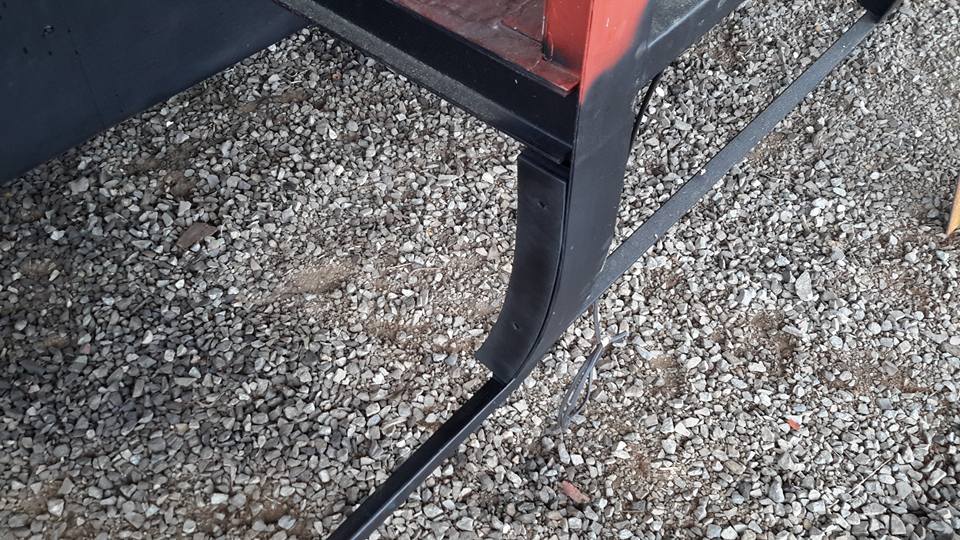
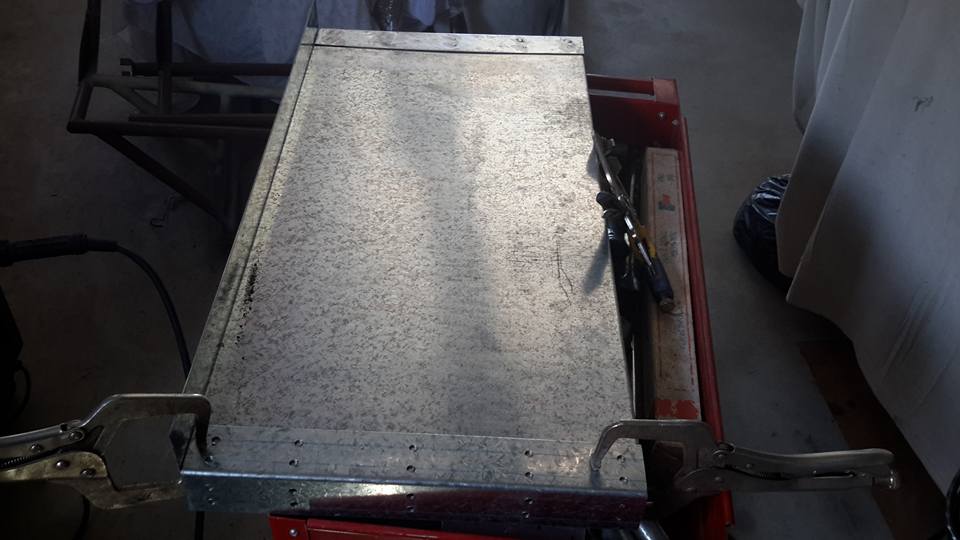
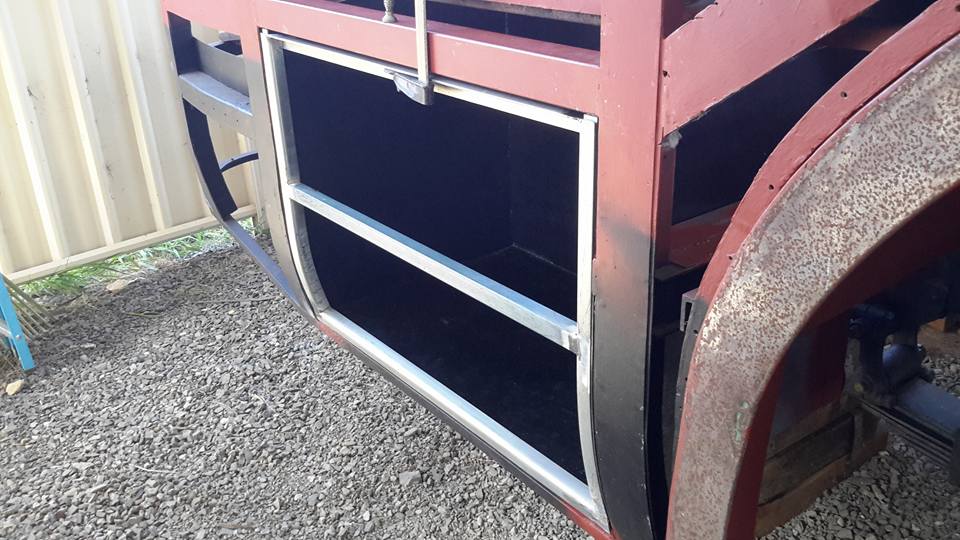
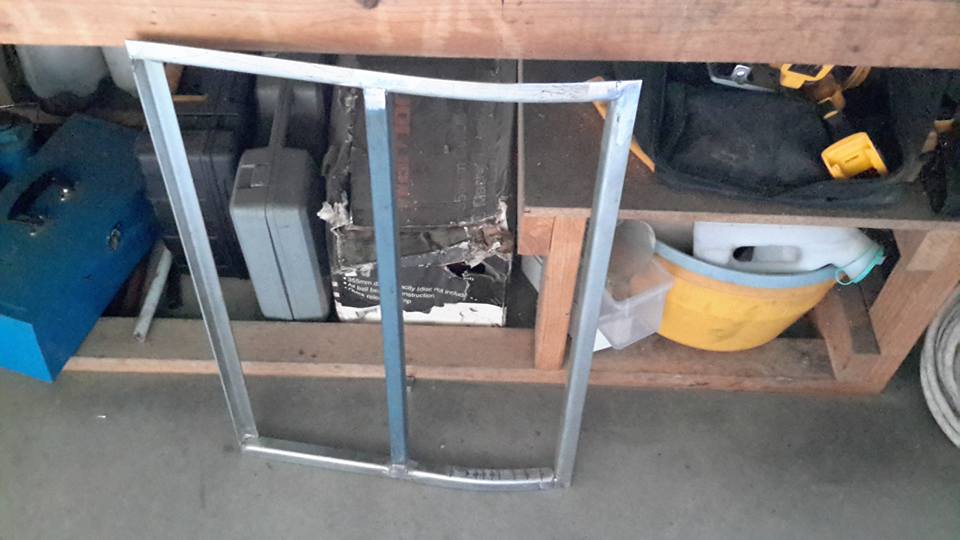
- I needed to be able to climb back up in the bus a little easier to preserve my hip so I permanently put the stair case in the front.
- Because this was remade and some of the pillars as well, I needed for the bottom aluminum parts to fit exact so lots of time was spent to get it right.
- I also reinforced the stair frame with 50mm x 50mm angle.

- 2 January 2017
- I didn't put these up yesterday.
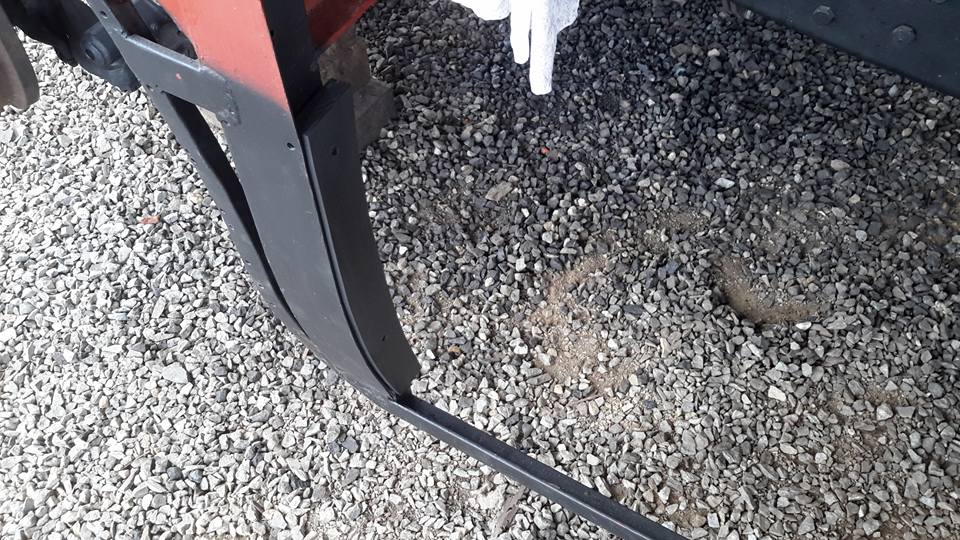
- They show the extra reinforcing I put in.
- They weren't on the original but somehow this now satisfys me.
- This is looking from the back of it.
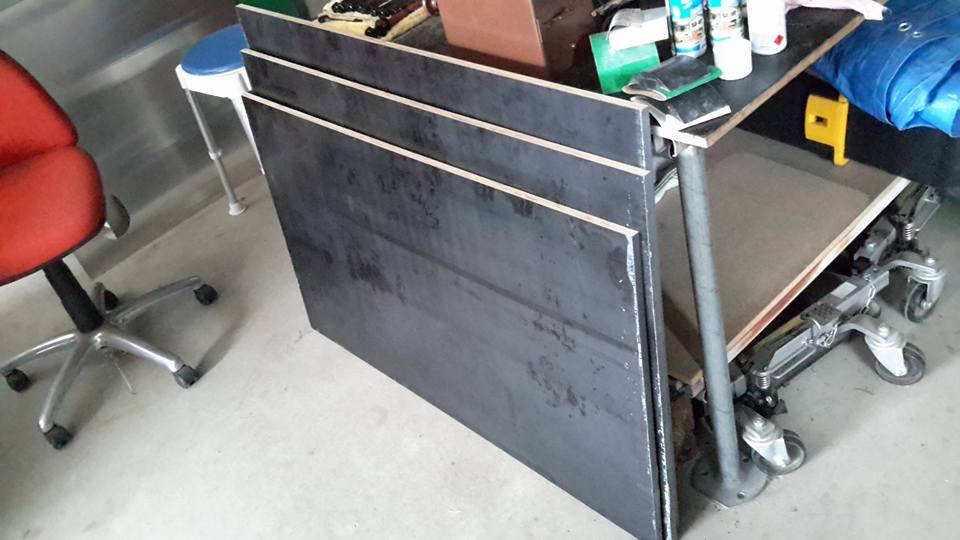
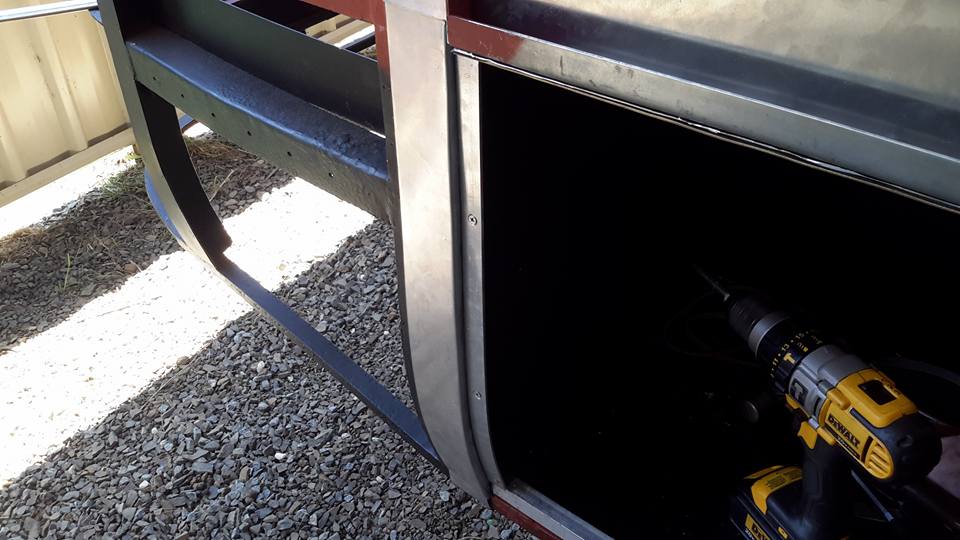
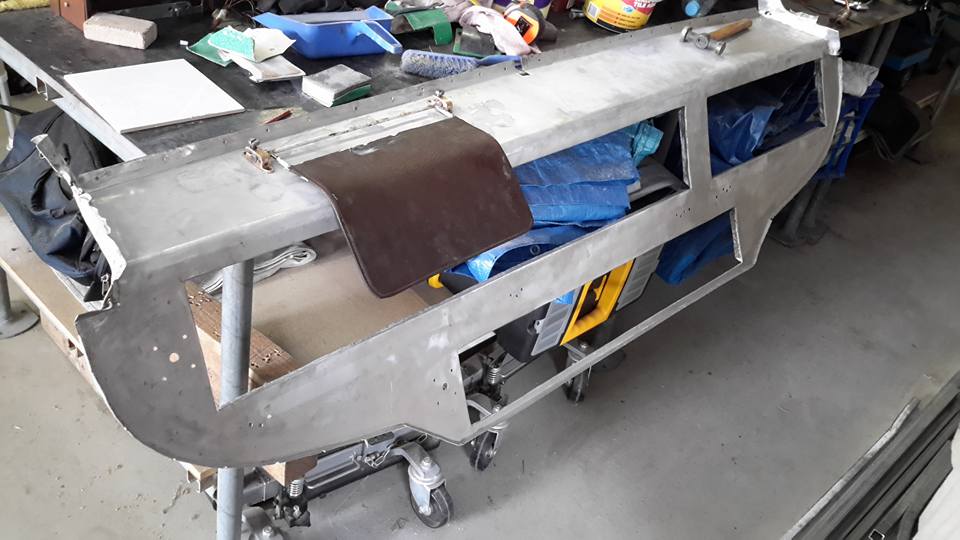
- 8th Dec. 2017
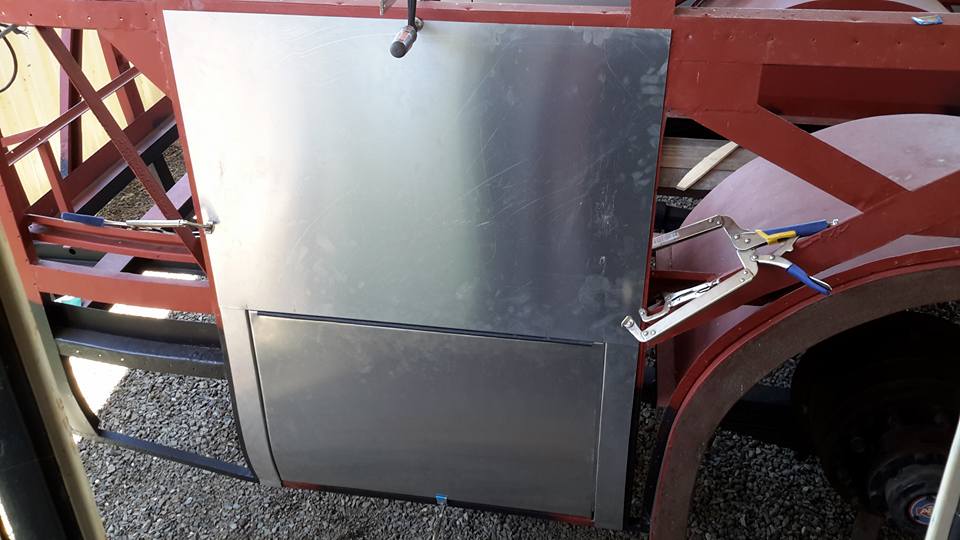
- I have been sitting down stairing at this scene wondering how I was going to make the new battery door and how it would seal.
- The original was all but gone so nothing that's a real good guide to go by.
- If I stair at something long enough I always come up with something. This new door is a different size.
- No automatic alt text available.
- Unlike the original, this door will fold all the way up so as to have easier access to the batteries.
- 10th Dec, 2017
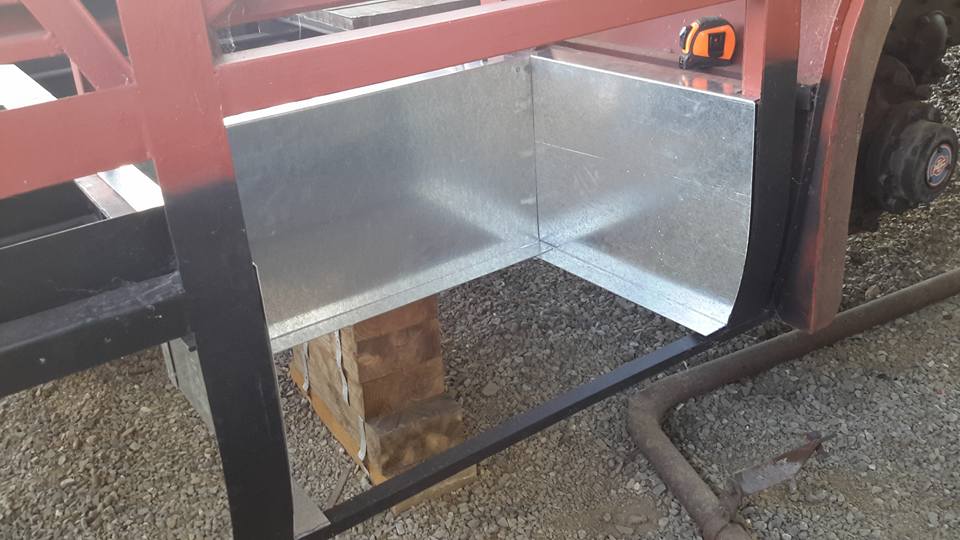
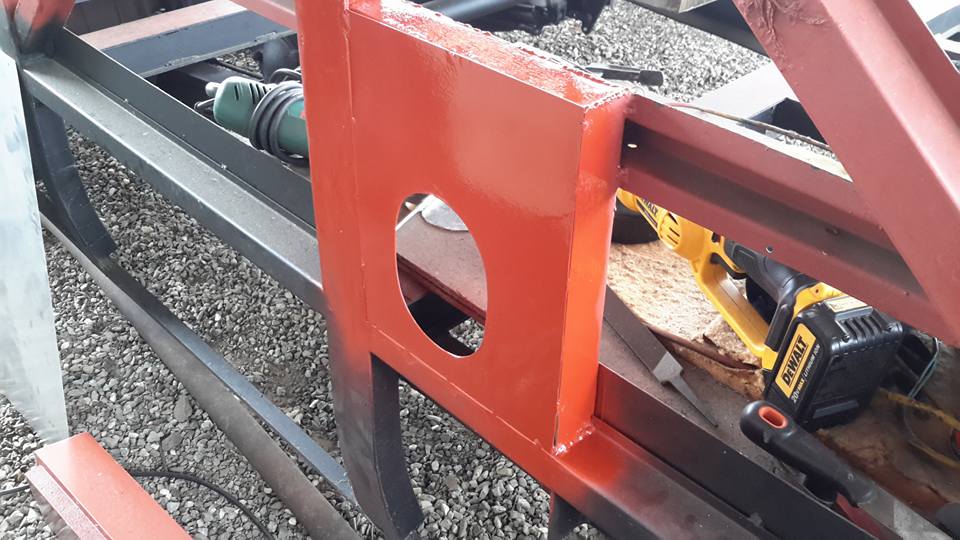
- I spent a few hours this afternoon welding the battery frame into it's position.
- Unlike the stairs this had to be placed in sections and welded from underneath and on top.
- Every measurement had to be exact so when the door goes on it is accurate.
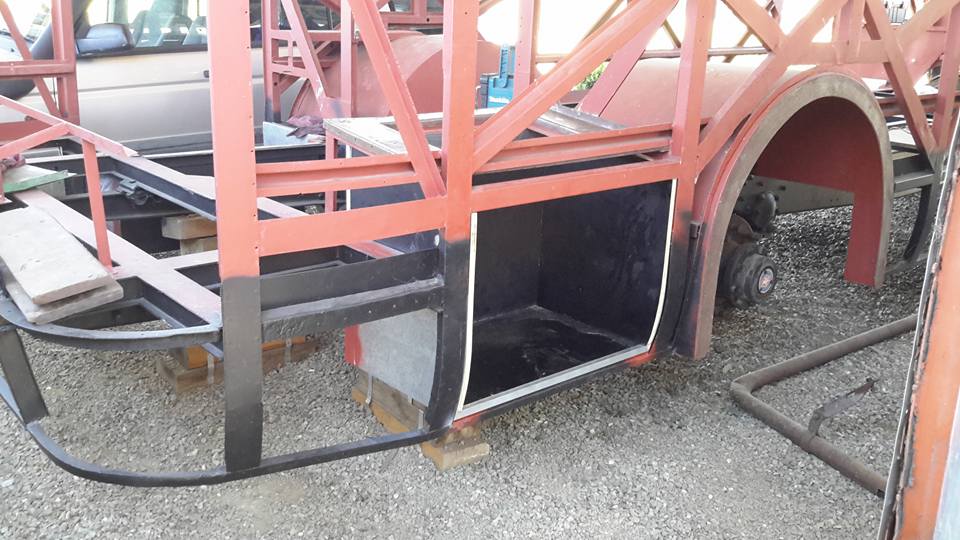
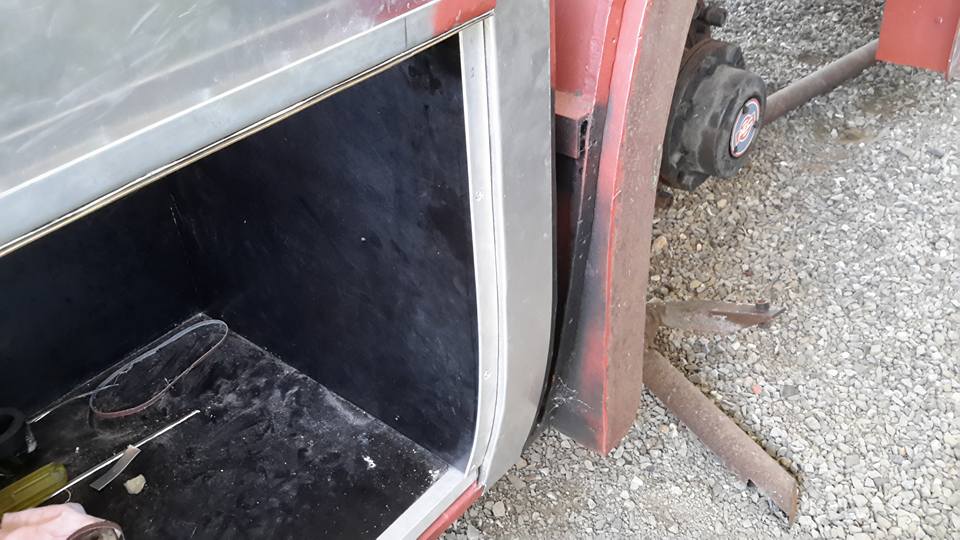
- I bought a sheet of 17mm structural ply and that will lign the box.
- It goes all the way to the top of the steel frame where the rear seat sits over the top of this.
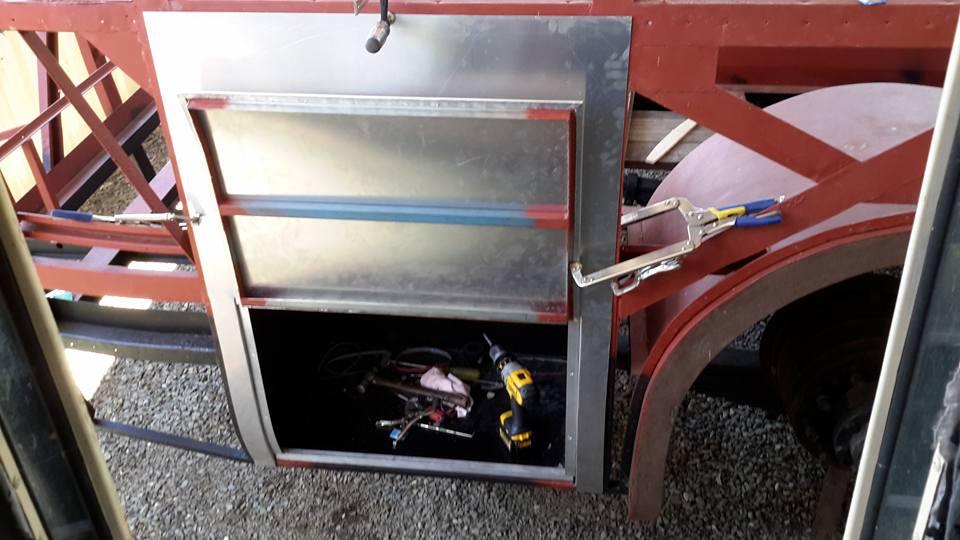
- Inside where the seat is situated the seat cushion comes out and exposes a hatch.
- Take that hatch off and you can see the batteries from the inside.
- Anyway, it will have a timber floor in this battery box and a frame will be made up for the batteries to sit in so as to not move around.
- A piece of rubber will go into each section where the battery sits so as to avoid more movement.
- These steel frames will be able to be taken out for easy cleaning and also for replacement if battery sizes change.

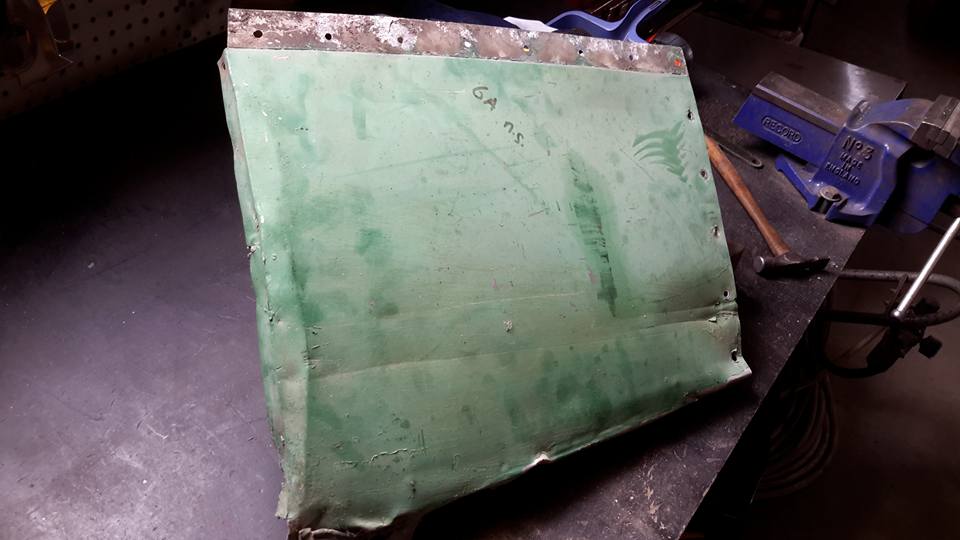
- 12th Jan 2017
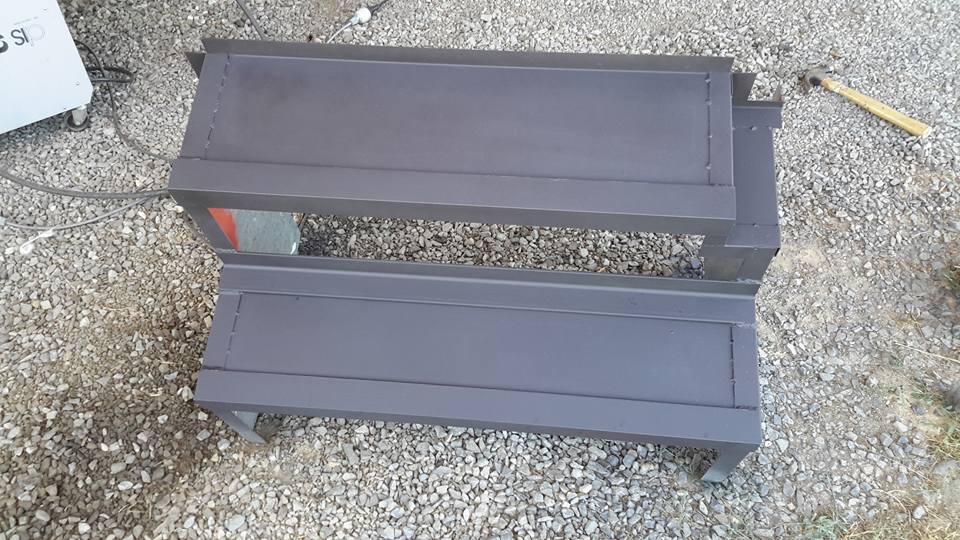
- Job half done.
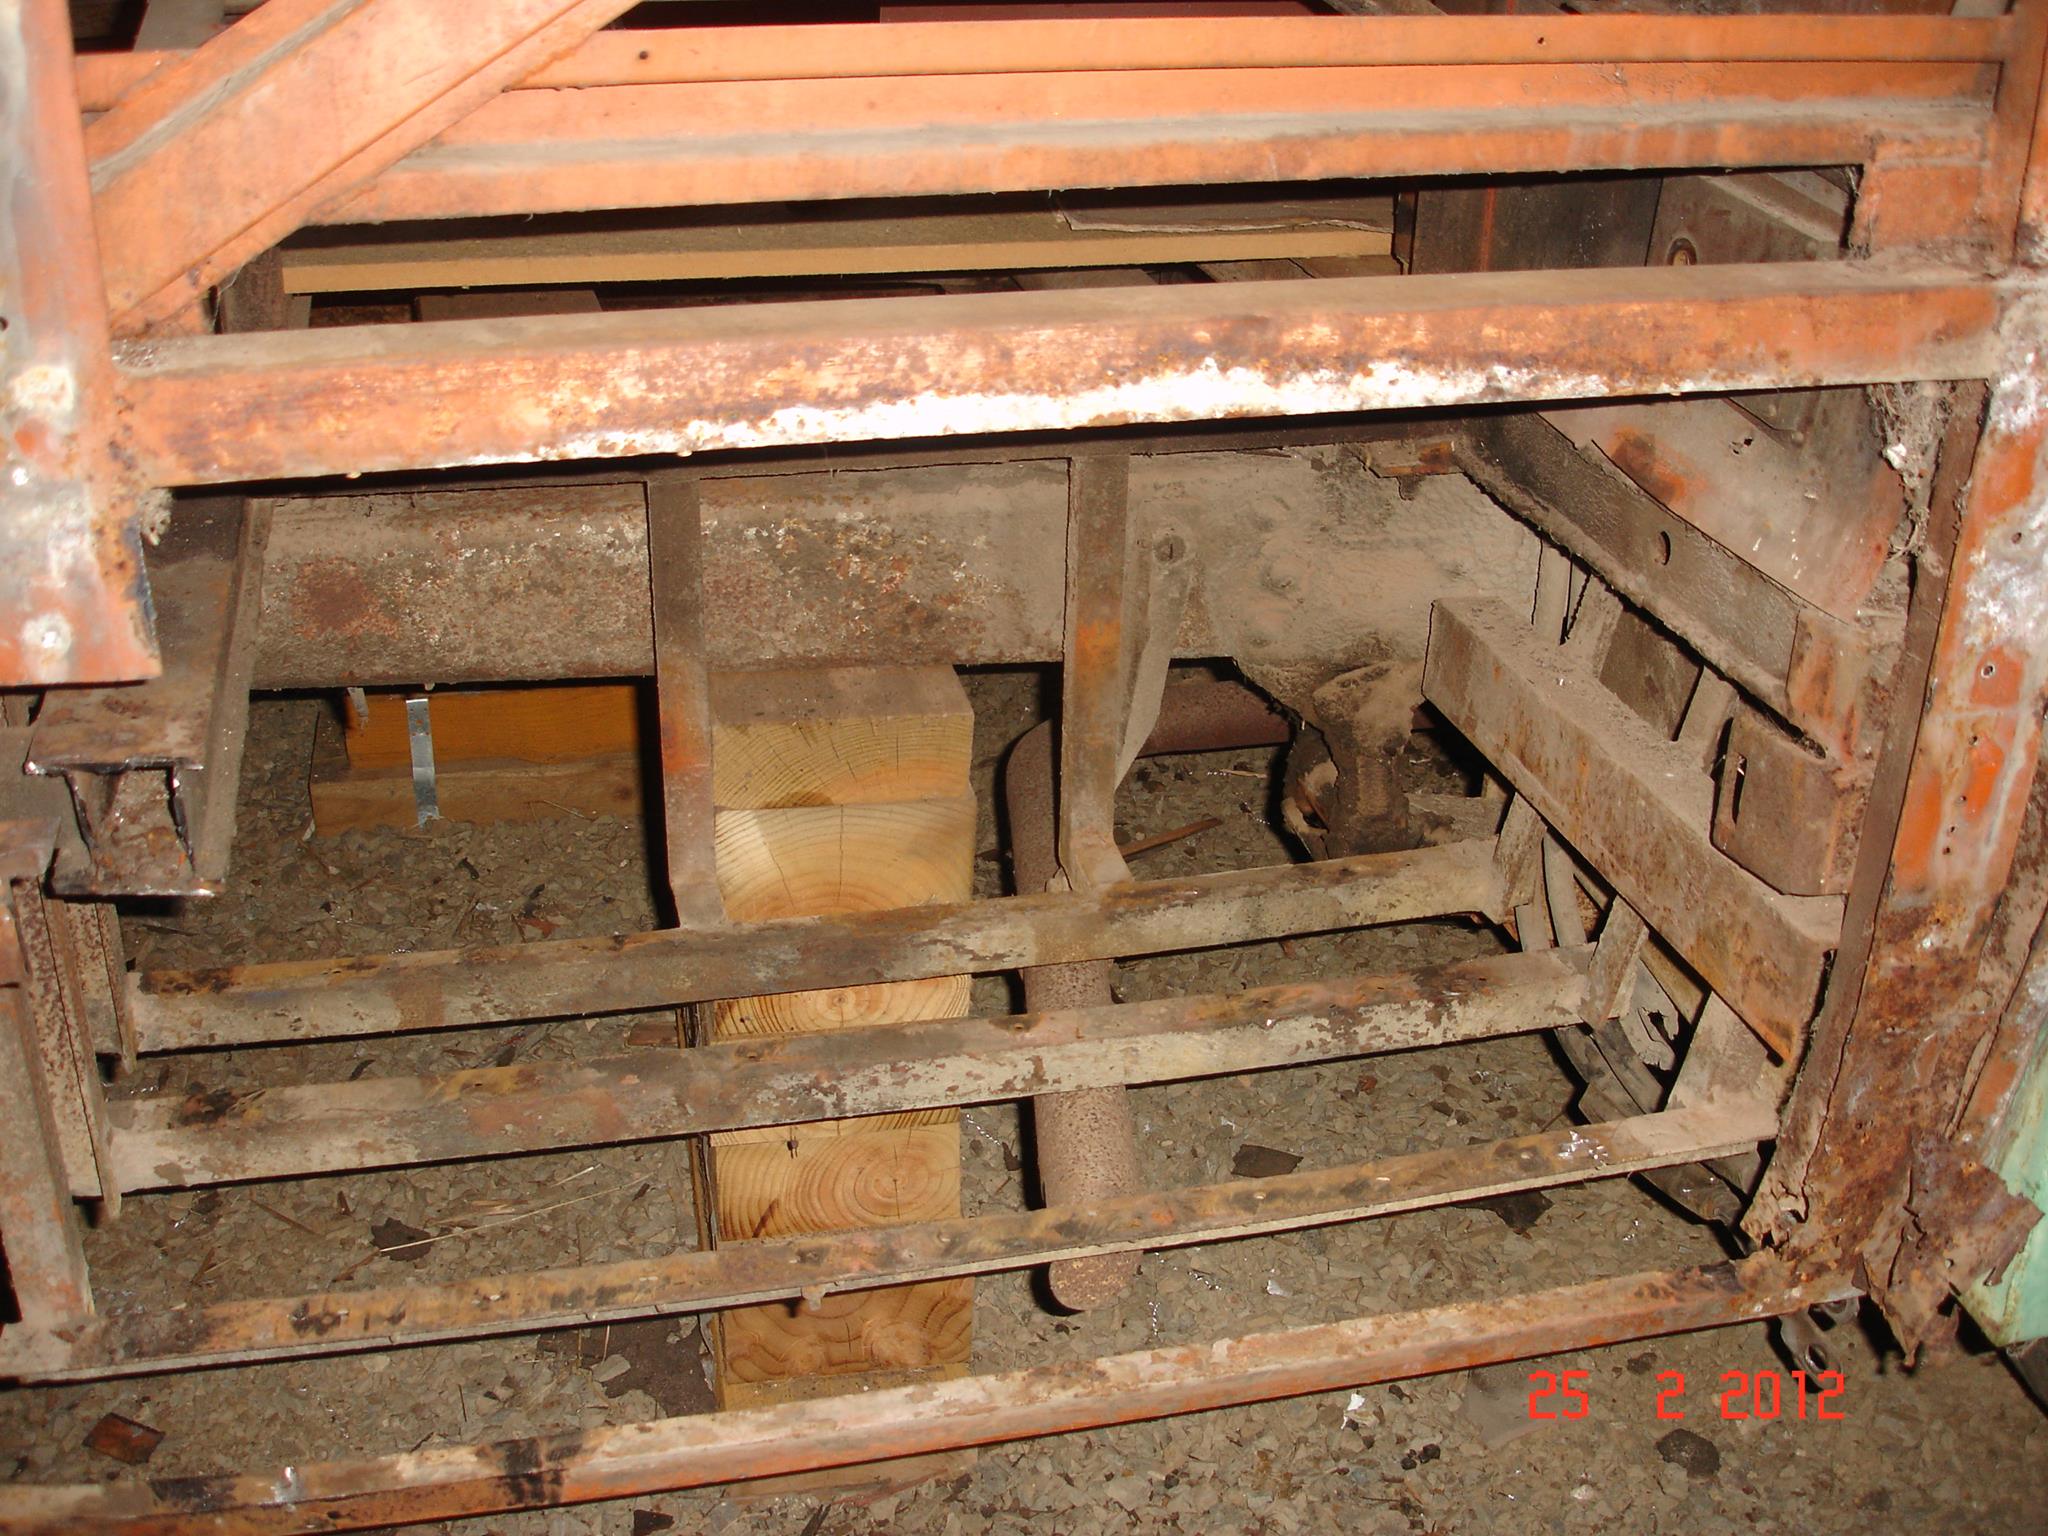
- Just wanted to show you what the Leyland battery box looks like.
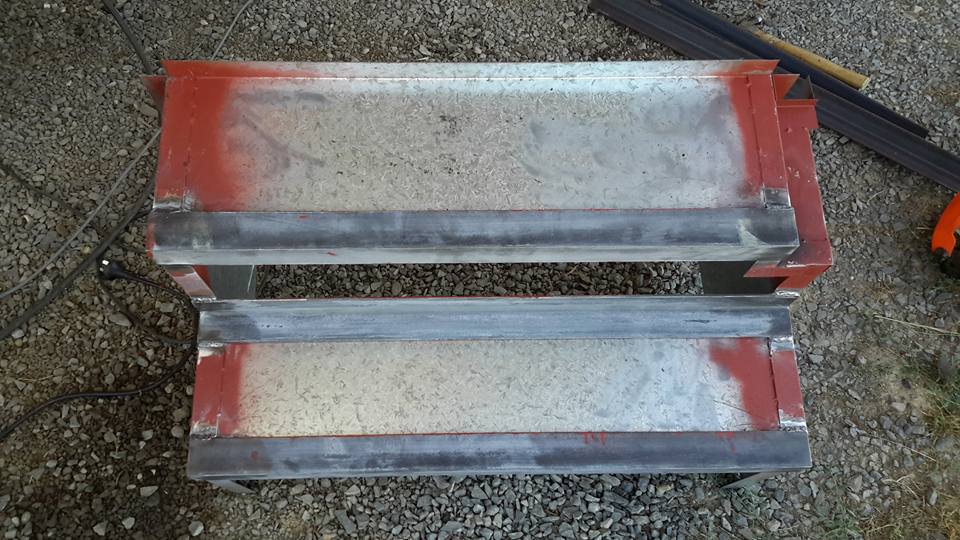
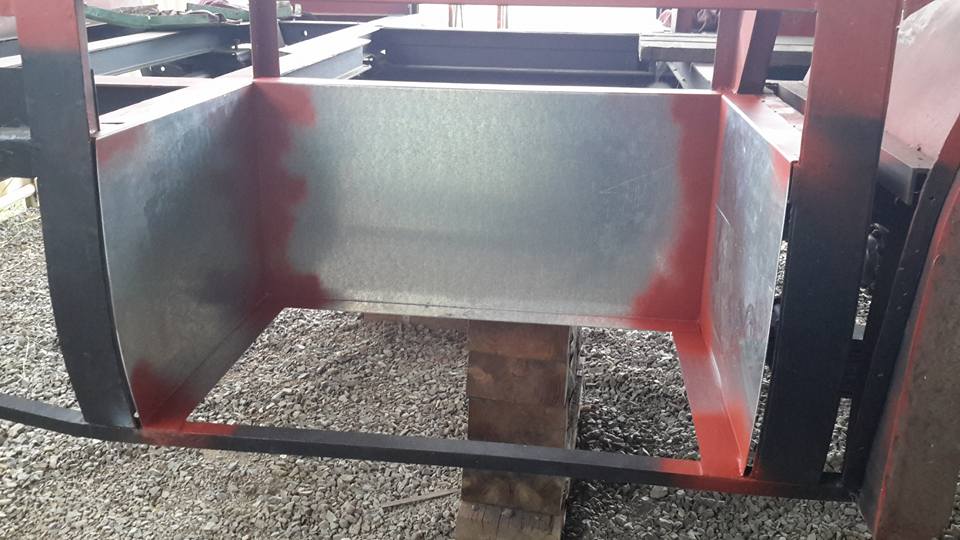
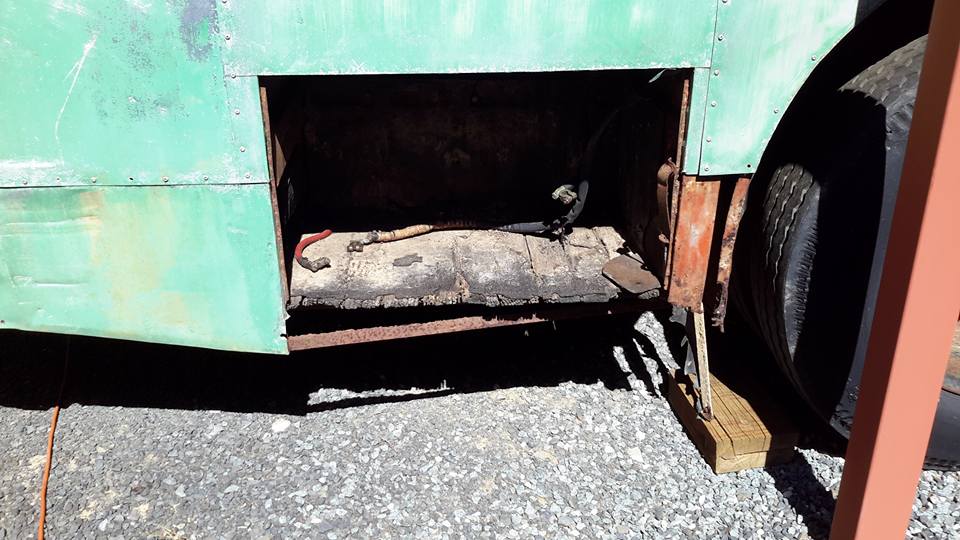
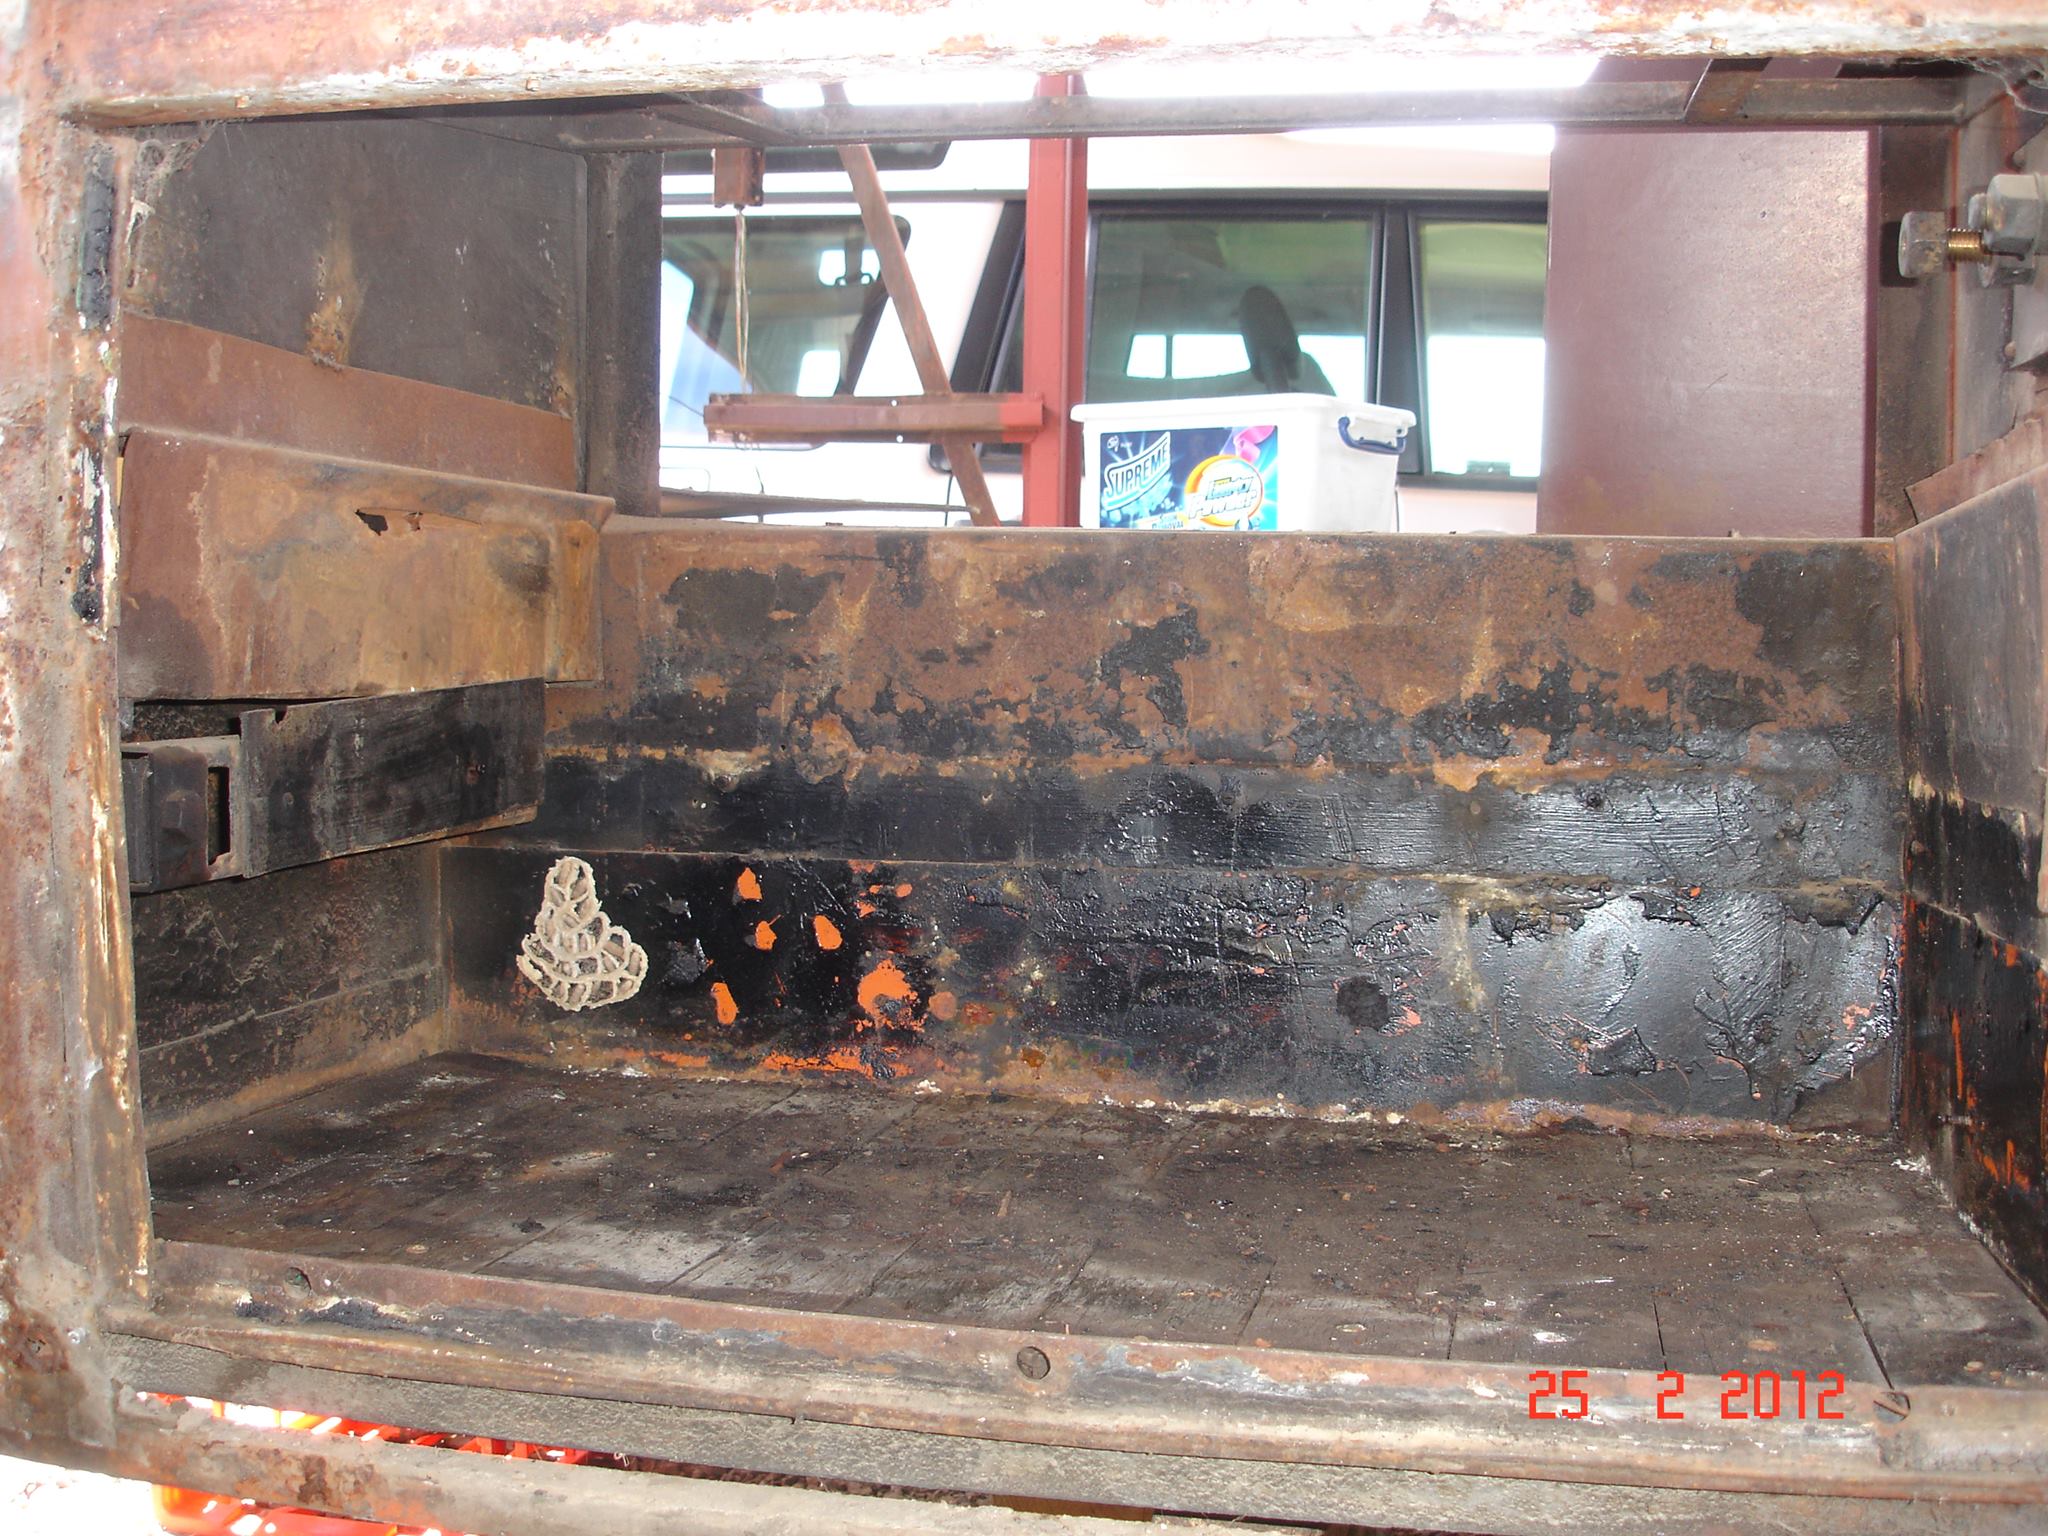
- This is what the AEC did look like.
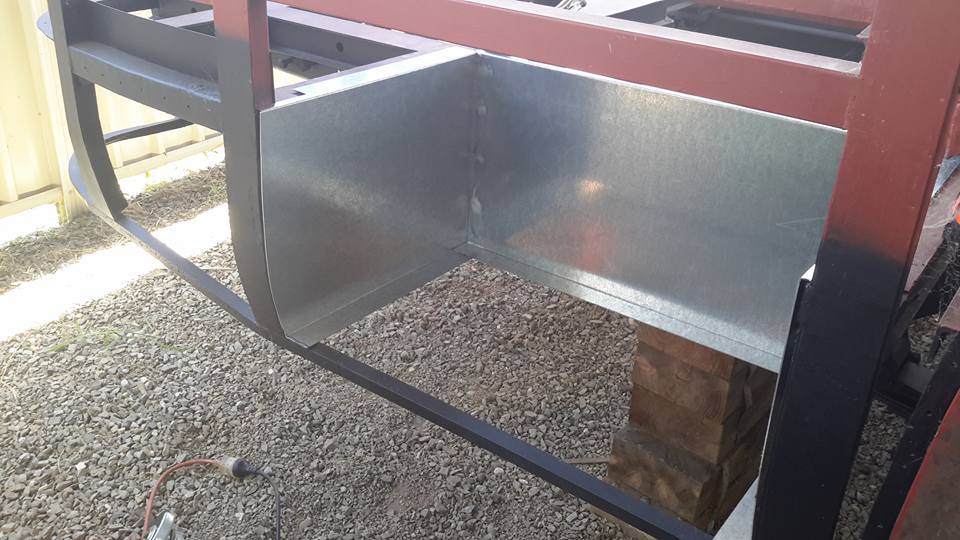
- I have now ligned the inside with ply and will make the swing up door tomorrow.
- There is also a picture of the hatch on the inside which is under a rear seat.

- Norm
- I got rid of this and made a much more pleasant looking setup and still does the same job.
- This is an overkill.
- Probably designed to carry the weight of 4 x 6 volt batteries.
- Norman Julian
- This is what it actually looked like. It was falling apart.
- John Lidstone
- Fascinating comparison and good work, as always you do.
- Forgive my non-preservationist (now) comment, but I've never seen a wood-lined battery box before - isn't that a bit of a fire risk?
- Norman Julian
- Never really given it much thought, John.
- Originally it was ligned with timber and steel.
- Looks like bitumen as well.
- I'm thinking that this will be no more of a fire risk as any other situation, but I will enquire.
- Norman Julian
- I was just thinking about what you said, John.
- When you think about it most car batteries are stuck in a cramped and small engine bay tucked inside a battery box made of plastic surrounded by plenty of ignition sourses and high temperatures.
- In my circumstance the 2 batteries have plenty of air circulating around them because of the space.
- No fuel or ignition sourse except for the battery leads and in a much cooler environment surrounded by timber which is a lot less vulnerable to fire over plastic.

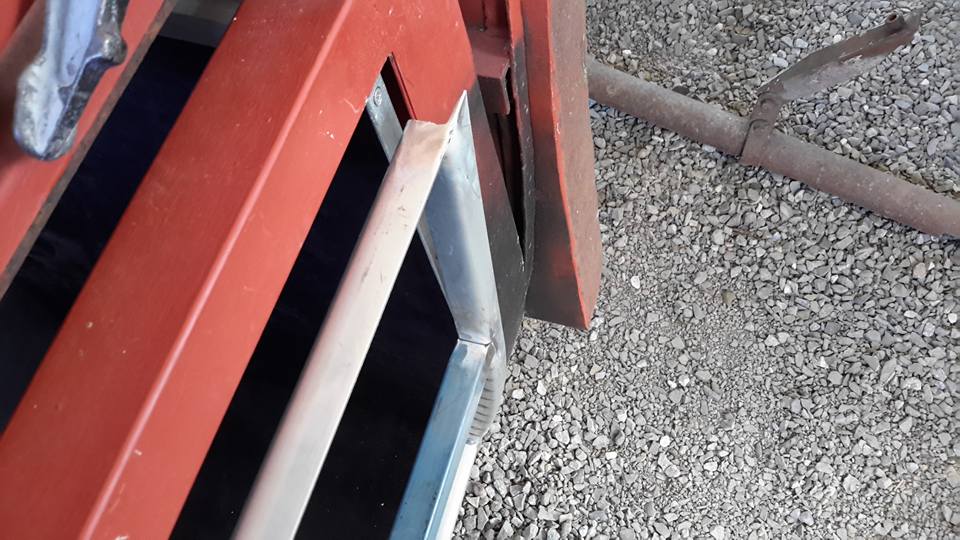
- 15th Jan 2017
- I had a mixed bag of results today.
- I finished securing the battery box and tried the swing do for size and I realised all too late that I didn't allow enough room for eveything else that has to go on with the hinge.
- Like 2 layers of aluminium and 2 layers of torneau material.
- I have to cut at least 5mm off the b top of the door.
- Bugger!
- Norman
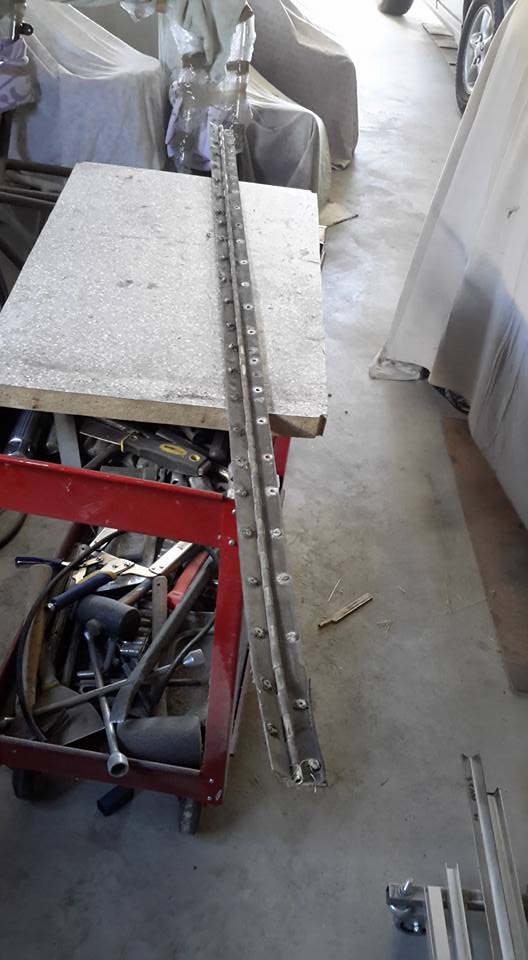
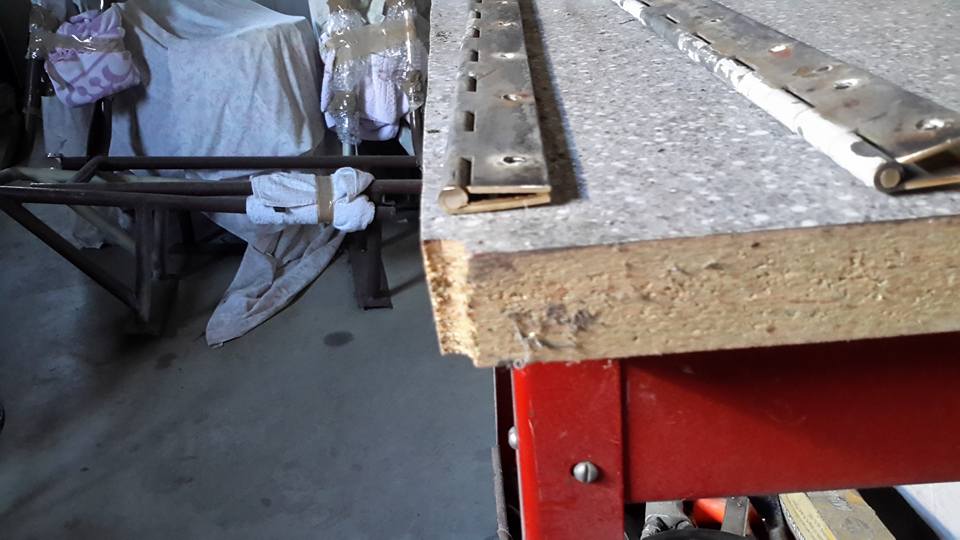
- This hinge is solid brass and really thick.
- With my culculations I never took into account such a thick hinge.
- I'm sure if this hinge today was still available it would cost around $200 a metre.
- 5mm will have to come off the top of this frame.
- 16th Jan 2017
- Very frustrating day today.
- I took 10mm off the top of this door to allow for 2 thicknesses of aluminium and 2 thicknesses of torneau material as well as the hinge.
- That in itself was easy enough but when it came to doing the permanent welding, things started to go pearshaped.
- The thing is I thought it may happen but it still did.
- I'm used to and mastered using my mig on thin metal where the temperature is low but doing thicker steel I still have some learning to do.

- What actually happened is when I welded the curve in the angled steel, there was to much heat which made the curve bend even more.
- I tried various things and after 4 hours of welding and cutting again and again I clamped it so it couldn't move and success.
- Very frustrating.
- Even more so I was having trouble with the shroud on the tip of the mig.
- Anyway, I cleaned up the hinge of old pop rivets.
- Brought the brass back to a luster [waste of time] and oil the long pin to make it easier to move.
- Andrew Blacklock
- mate if you can weld thin stuff with the mig, you wont take long on think stuff
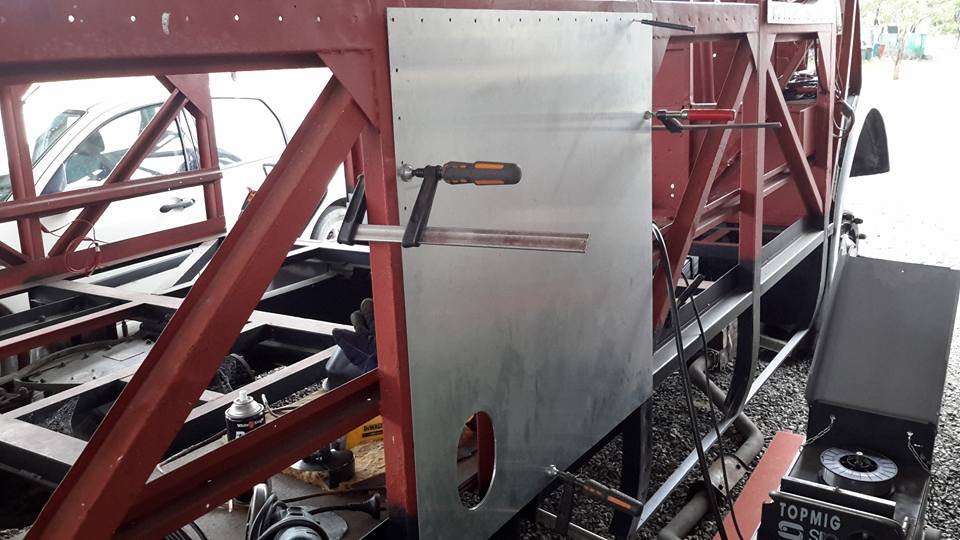
- 20th Jan 2017
- Norm
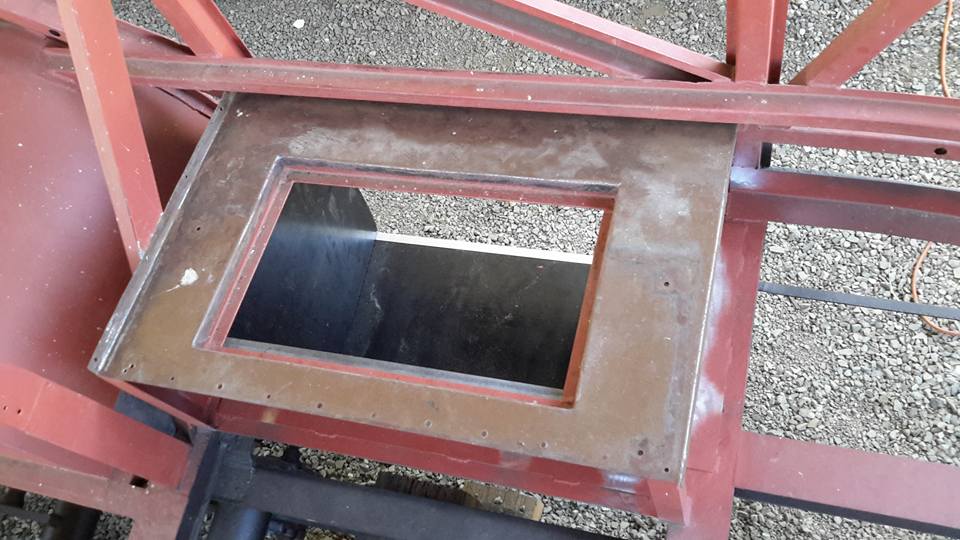
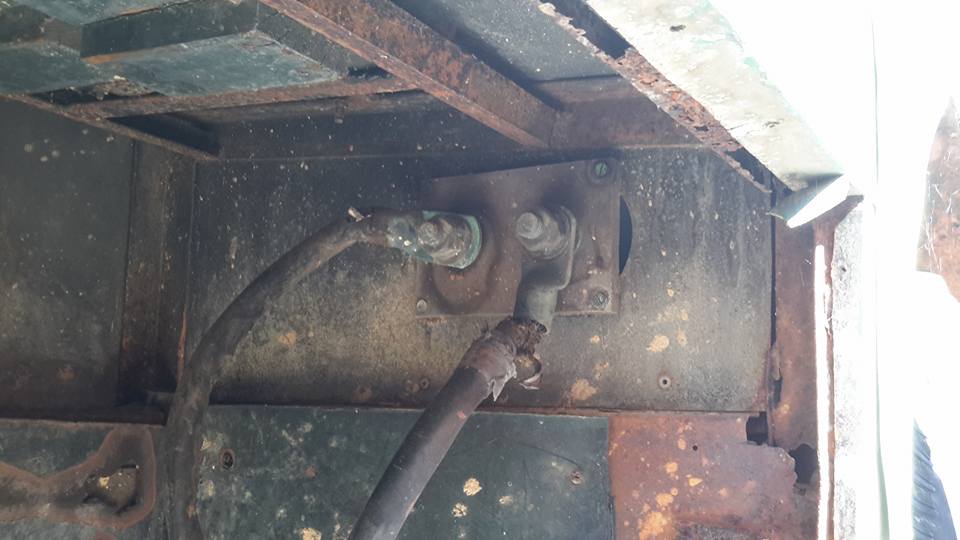
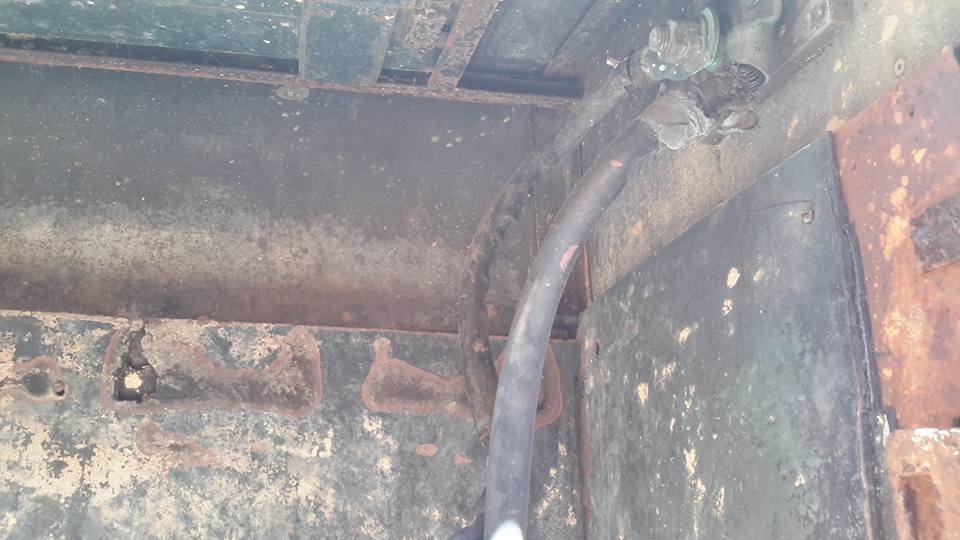
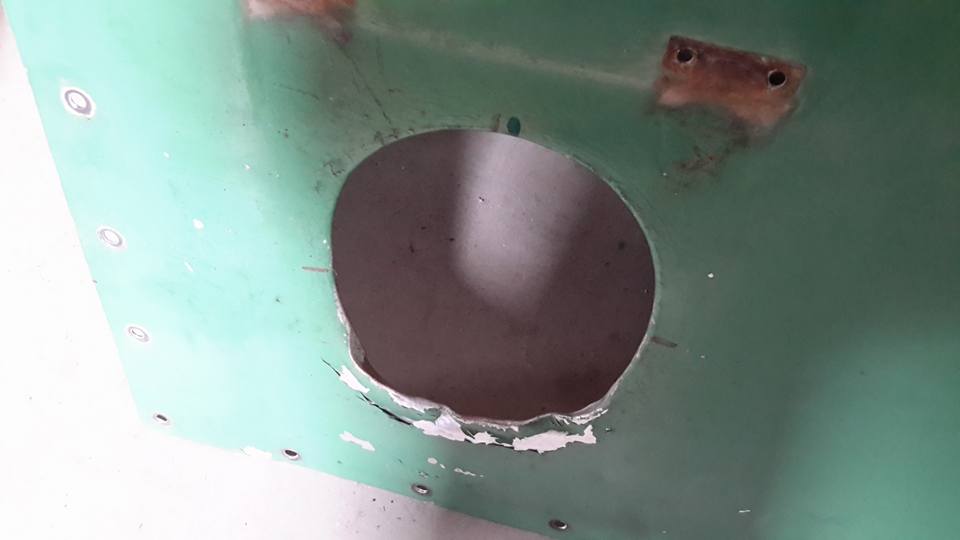
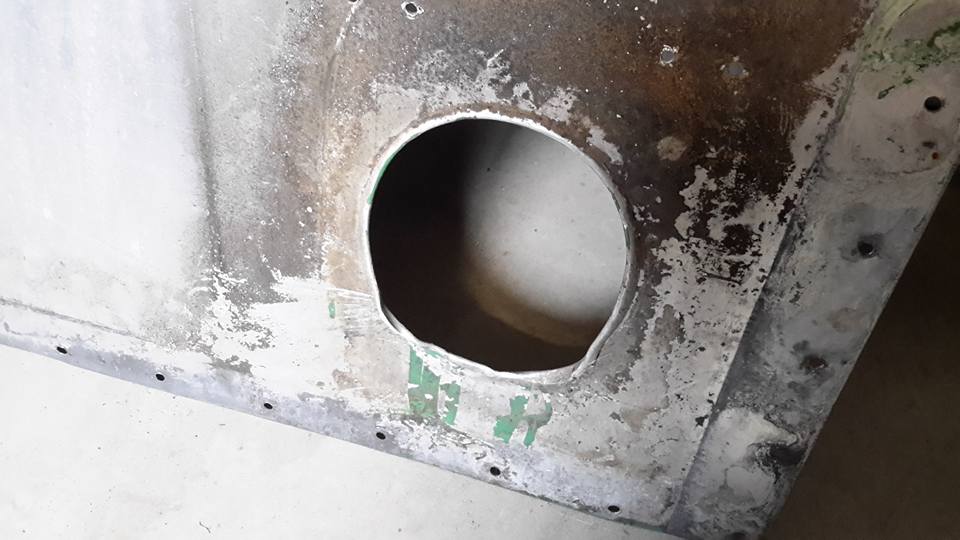
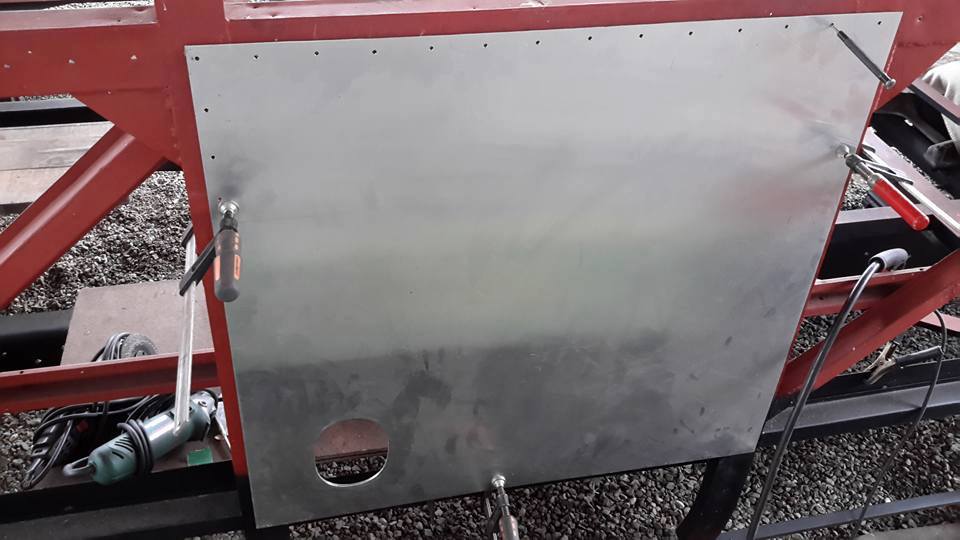
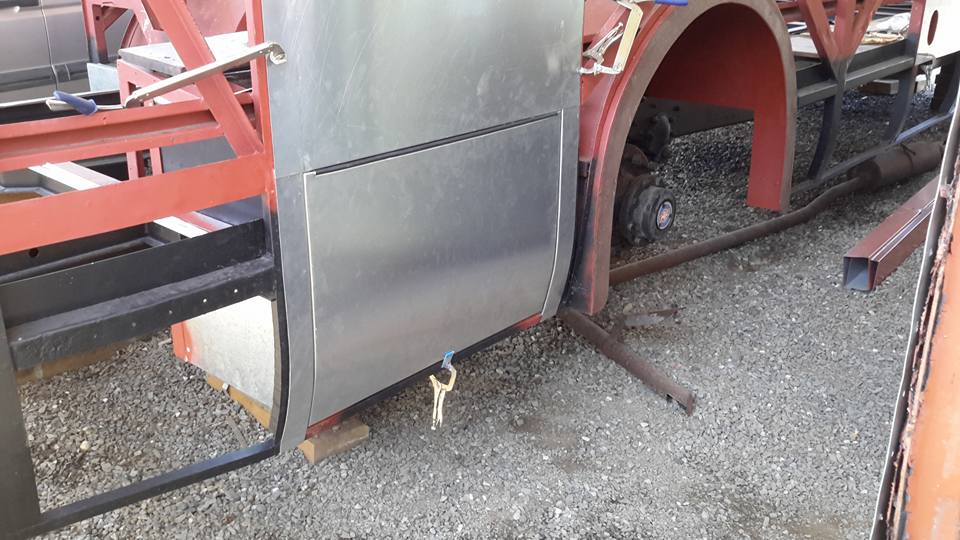
- This panel is located around the fuel tank and this is the fuel filler hole.
- This panel needed to be replaced unfortunately because of the damage it has had over the years.
- I can't reproduce the rounded finish that you can see around the edge of the hole because I don't have the necessary tooling.
- So I welded a 2mm panel on the body of the bus the same shape as the hole in the new panel to give it the rigidity of the original one.
- Andrew Blacklock
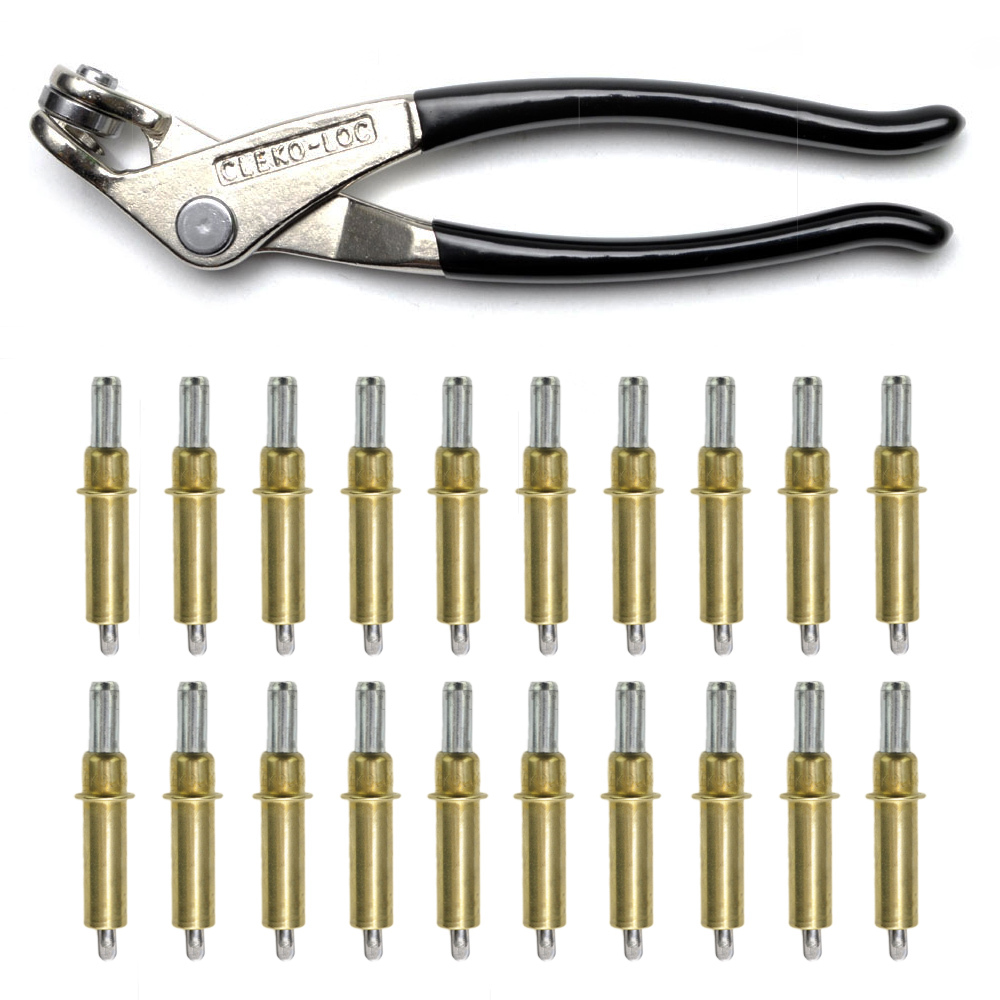
- you need a 3/16 Cleco set for panel work.
- Stuart Brown
- I agree some clecos would be very useful from here on Norman especially as you already have drilled holes in the sheets
- Andrew Blacklock http://www.melomotive.com/3-16-20pc-cleco-kit-with-pliers 3/16" 20pc cleco kit with pliers
- Norman Julian
- The previous owner of this bus put a hinged flap over the hole and put a padlock on it.
- probably to stop some fool putting something that's not supposed to go in there.
- I'm thinking of something that is a bit more to my liking and professional to put h
- Stuart Brown You could put a sliding door between the two panels you have though that might have been easier before you welded on the inner one...
- You would just need two side guides on the inner panel for the door to slide between and not go skewed when going up and down.
- Norman Julian
- Thanks Stuart. I have an idea.
- Edward Parker
- Pair of pliars and ball pien hammer and anvil takes about 2 mins done heaps
- Andrew Blacklock
- without denting or stretching panel? how much bog did u use to finish it
- Edward Parker
- None just do slowly
- Every bus we have has had then replaced done alloy and steel sheets
- Norman Julian
- It's done now.
- Looks good.
- Not proficient at the other method.
- Edward Parker
- Best way is to grind edges on your fav pair of pliars to take shearp edges off
- Norman Julian
- Thanks for your input fellas.
- Much appreciated.

- 20th Jan 2017
- Haven't been looking forward to getting to this stage
- 21 Jan 2017
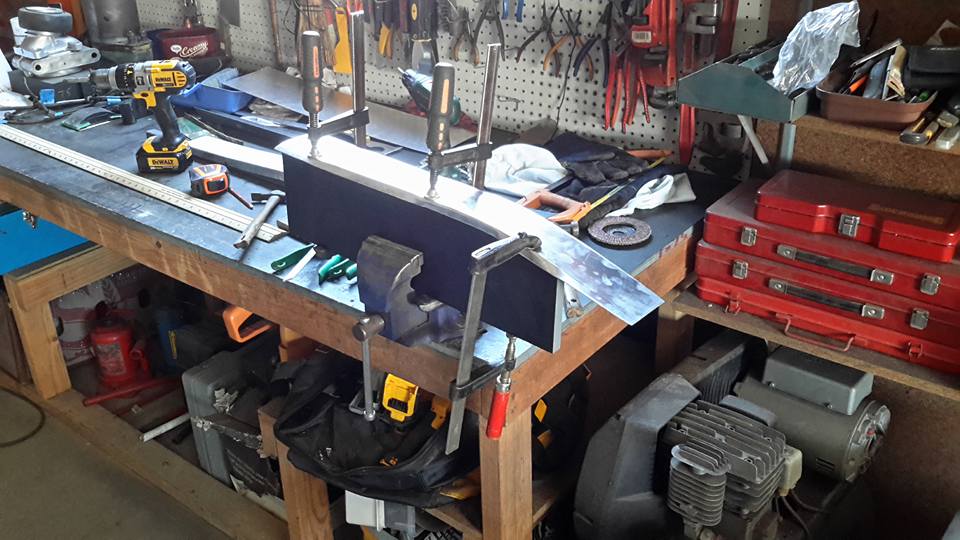
- Next job to make a sliding door for the fuel filler.
- What was on there wont do the job anymore.
- Introducing my state of the art angle shaping jig.
- No stretchers or shrinkers here. LOL.
- 22 Jan 2017
- I can finally move on from this segment.
- Lots of time spent here.
- Not experienced in making panel shapes like this.
- 24th Jan 2017
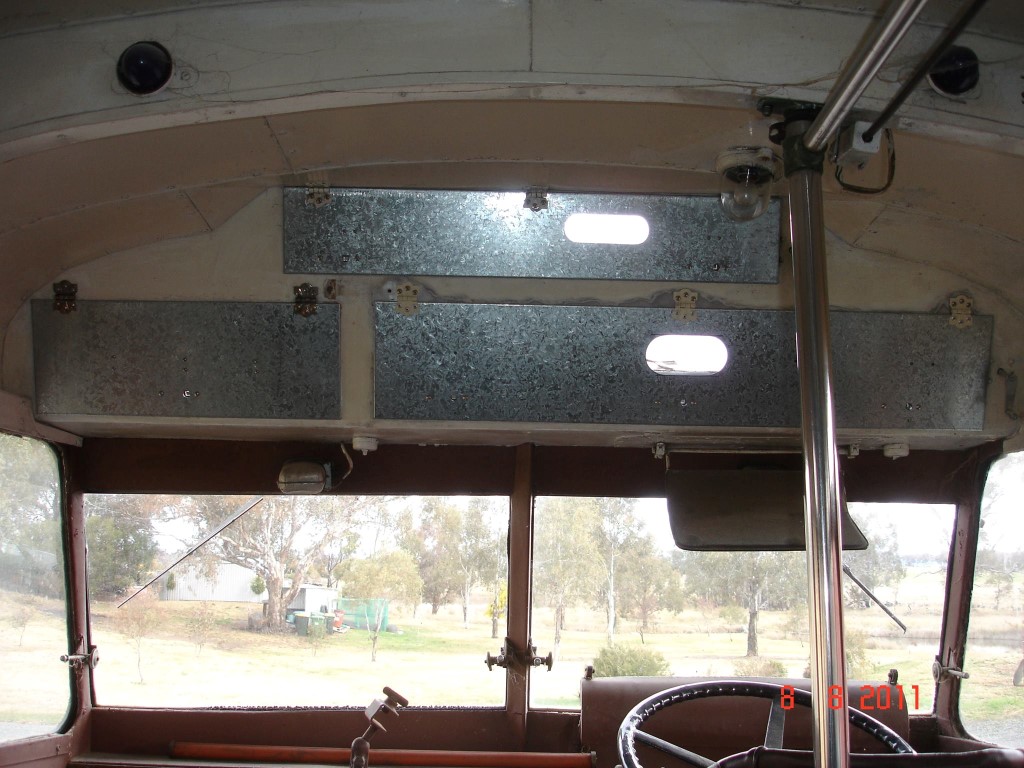
- Now where does this visor go again.
- The other jobs I was going to do I set aside because I don't have the materials or the tools, so I decided to finish off more interior panels.
- This is the front panel just up from the driver holding the destination rolls etc.
- It was a badly damaged panel that required panel beating and lots of welding.
- This sun visor got really stiff on the swivel at some stage and the drivers using it either never thought about reporting it or at least oiling it and therefore tore this panel apart.
- It is only thin aluminium so something had to give.
- Anyway, patch after patch was placed up there to strengthen but still tore the metal.
- I had to take the patch off and weld up all the rivet holes as well as cracks.
- Now it is great and I don't know where the visor is supposed to go. LOL.
- Stuart Brown
- Have you got a before photo....
- That might help
- Greg Scott
- I could do some measurements of mine if you like norm ?
- Norman Julian
- Cheers mate.
- I have pictures.
- Besides, all the pictures of other buses they are in different positions.
- I'm going to put it central of the driver's window.
- Norman Julian
- Central in this picture
- Carle Gregory
- what about the Leyland? would it be in a similar position?
- Norman Julian
- All over the place Carl. The Leyland one is also wider.
- Norman Julian
- For years I always thought that the Leylands and the AEC were similar, but now not a day goes past were I once again find something different between the 2.
- Greg Gibson
- What about putting it in the centre of the steering wheel?
- Wouldn't that be better from a drivers point of view?
- Hard to say without being there and looking at it
- Norman Julian
- When it is centred over the drivers window, it will be centred over the steering.
- I'm more looking at how far back towards the window it sits now.
- If it goes where it used to it will hit the wiper motor when it is folded down.
- The Leyland one does that.
- I can bring it a little forward. I may just wait now and do it at the end.
- 26 January
- Lots of painting today especially some of the bits before engine mount goes back in, but I did put this panel back in


This site is hosted on
Fatcow  Unlimited Web Hosting |
Last updated January 2017 |
This web site may contain Copyright material If you find any problems with the site, please email the Web Editor  |