Norms Restoration - 31 Seater Projects |
1952 AEC Regal III [2547]
2017
Oct Elecs
- Norman Julian
- 7 October at 15:58
- Another job out of the way.
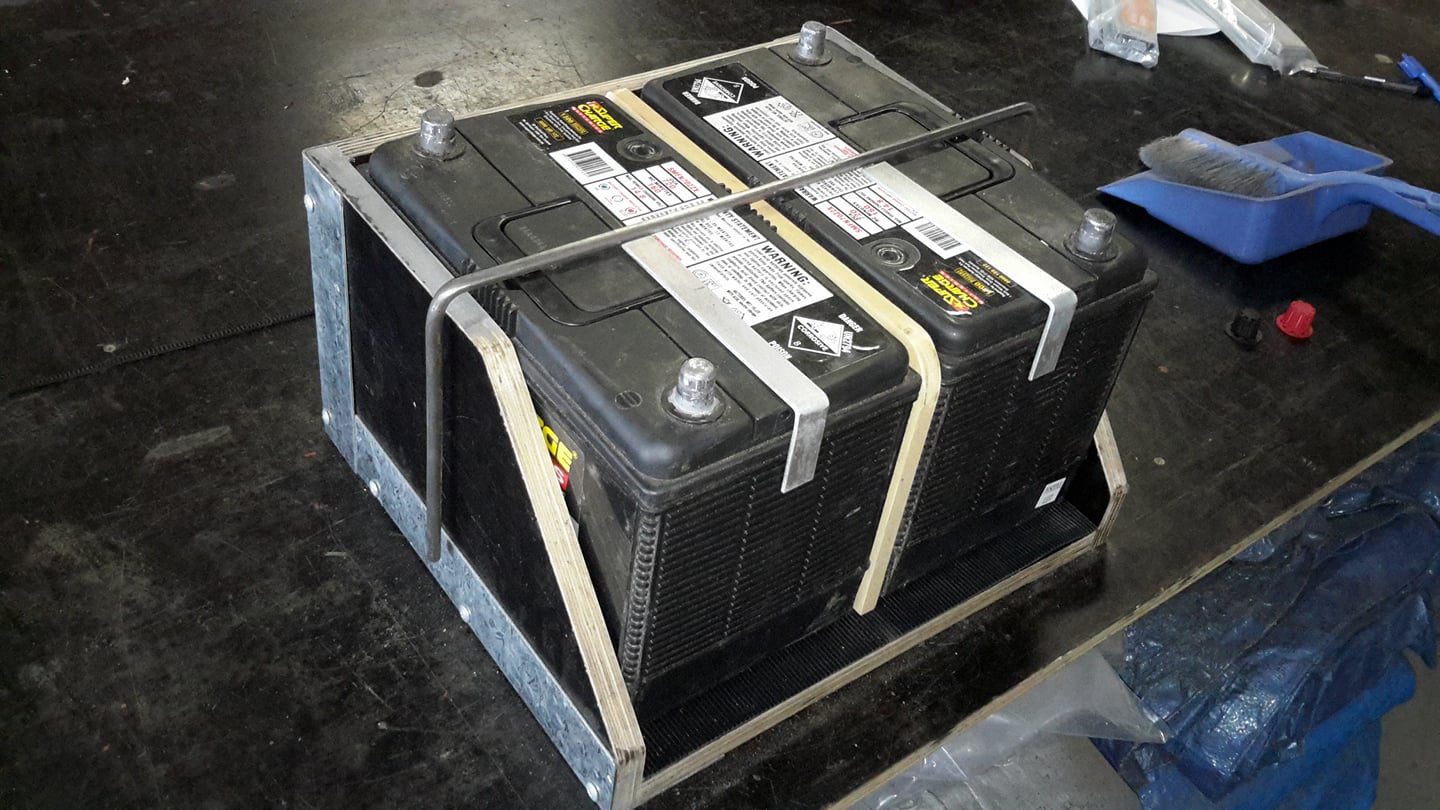
- Battery carrier on sliders.
- Easier on the back. I'm happy with the way it turned out.
- You don't have to get on your knees anymore and struggle lifting these heavy batteries.
- Just have to pull it out and lift off.
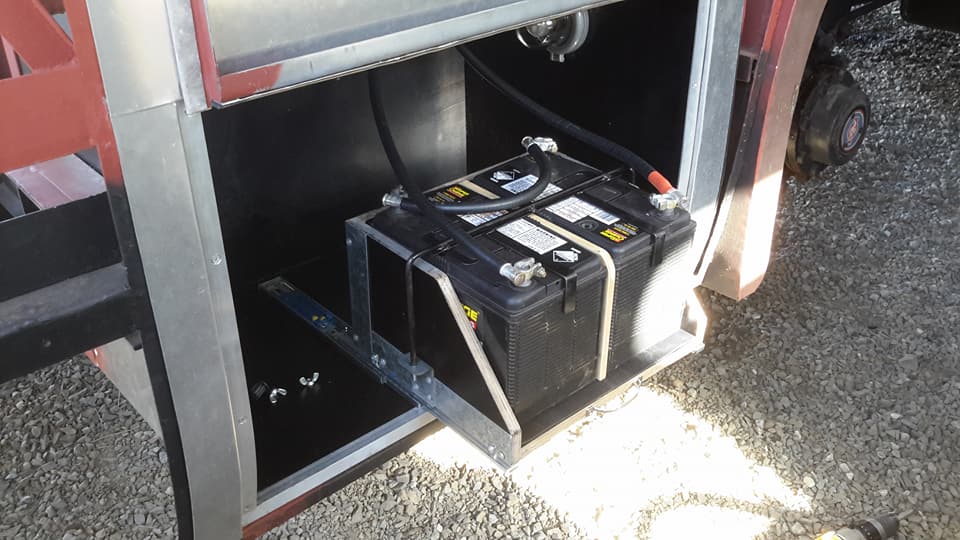
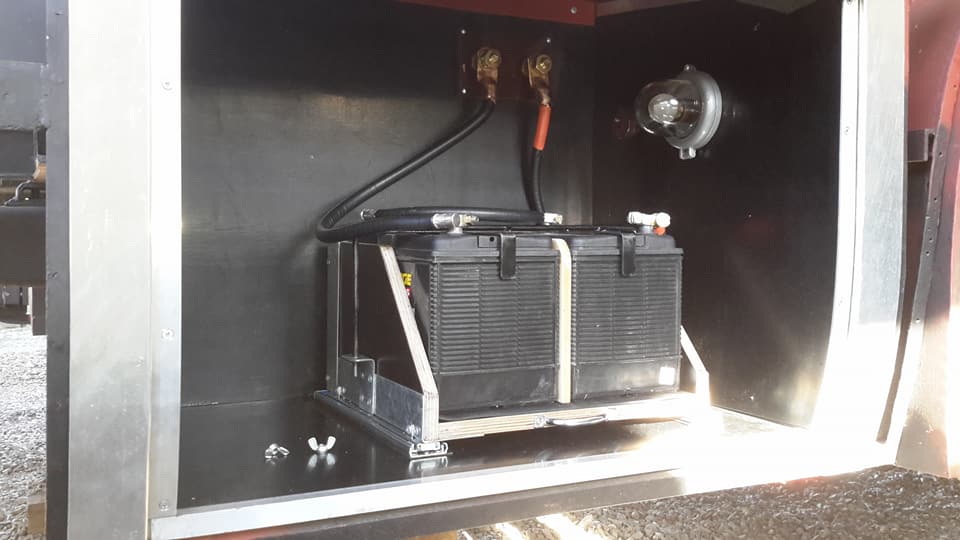
- Norm
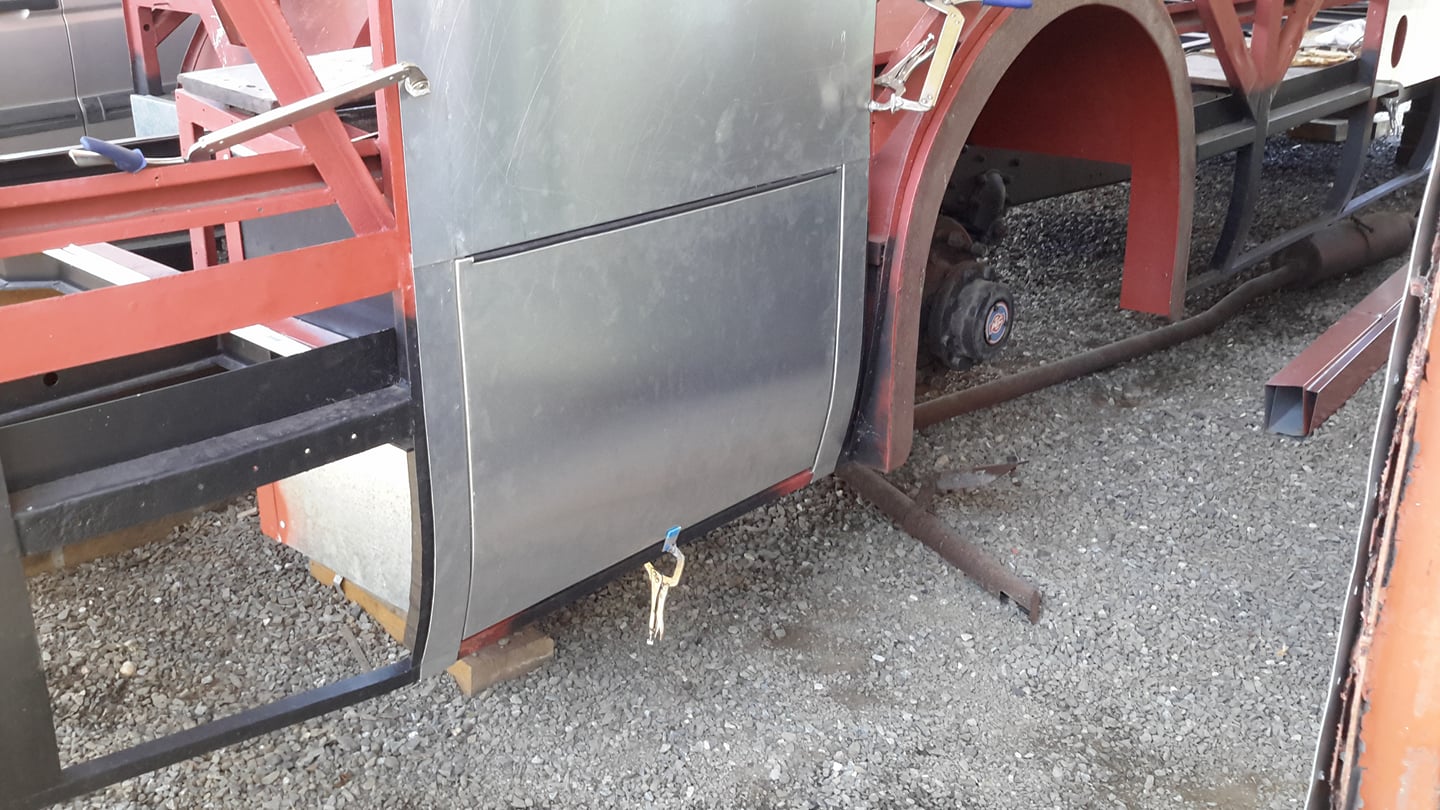
- The only thing in this area now to do is install gas struts and a concealed lock.
- Garth Taylor Brilliant.
- Norman Julian
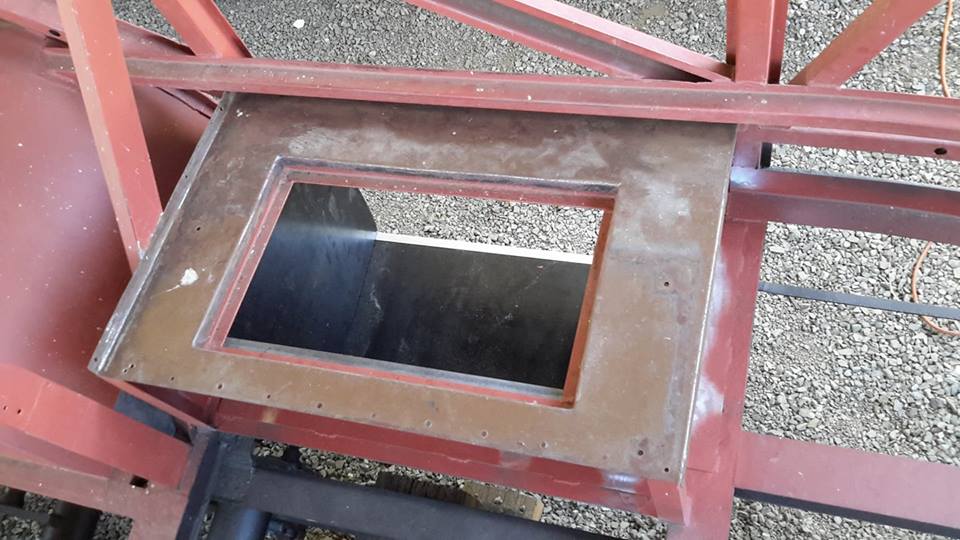
- The lock can be accessed through this hatch by taking the seat cushion off and reaching down and unlocking it.
- These days security is warranted.
- Norm
- The lock can be accessed through this hatch by taking the seat cushion off and reaching down and unlocking it.
- These days security is warranted.
- Gary Russell
- Clever innovations that save your back and add security but still keep the historic integrity that you want.
- Norman Julian
- Thanks Gary.
- There will be minor changes but most people wont notice them at first glance.
- Norman Julian
- 4 October at 17:03
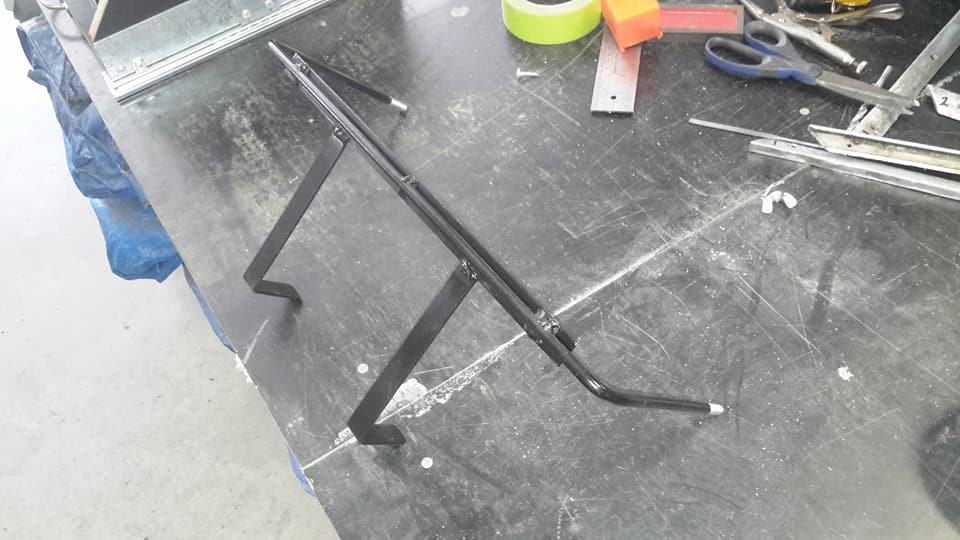
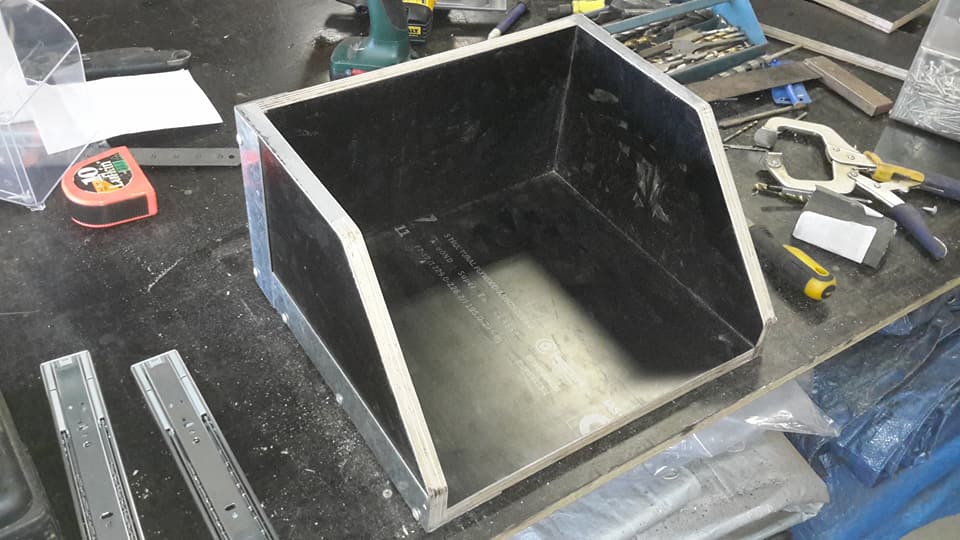
- Inspiration was hard to come by today.
- I stared at this thing for ages trying to work out a way of bracing it that looked like it belonged.
- I tried a few ways and I decided on this.
- The 2 angled plates at the front on the top will be welded to the round rod to stop the batteries moving forward.
- The steel rod that was bent will be threaded on either end so a wing nut can screw on.
- The threaded part of the rod will go through an angle bracket.
- This system will clamp the 2 batteries down and not move. To take the batteries out just release the wing nuts and the whole thing comes off.
- Norman Julian
- 1 October at 16:46
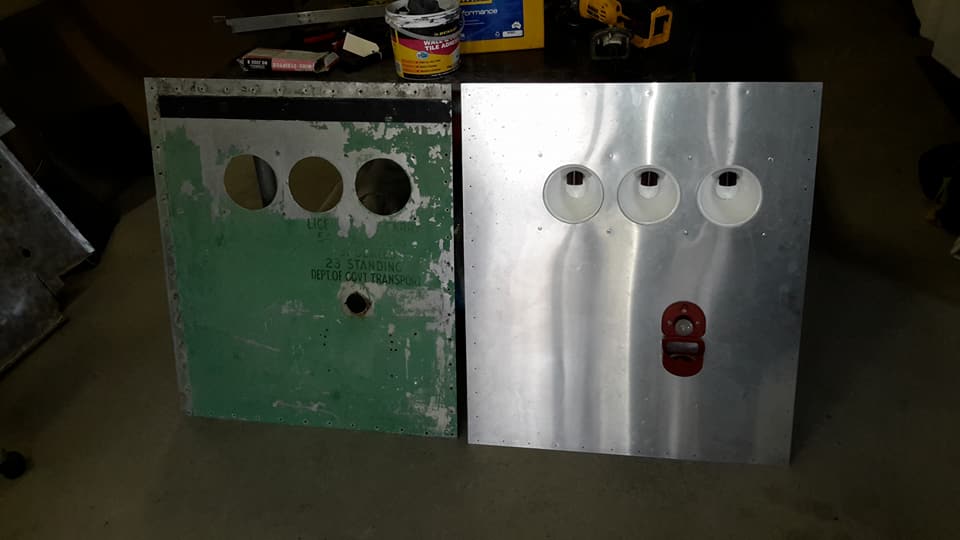
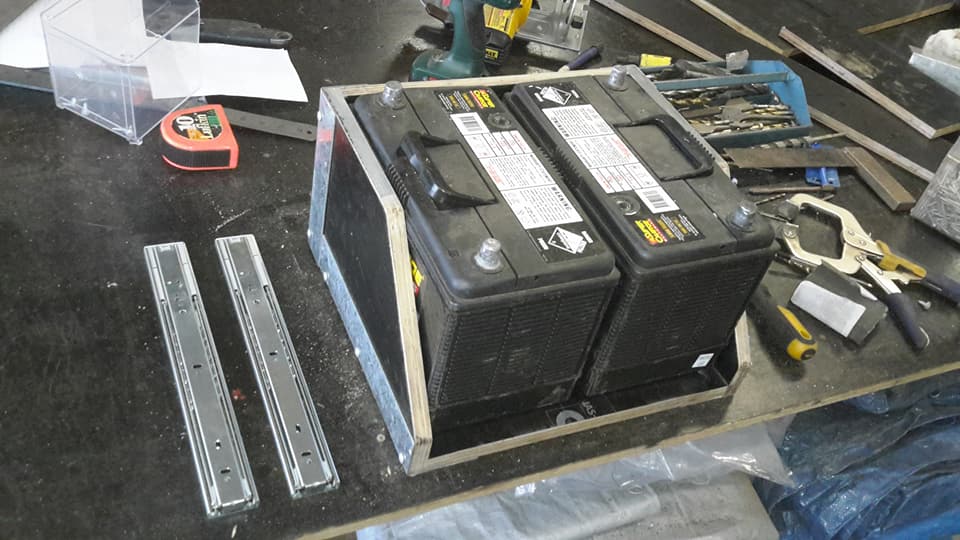
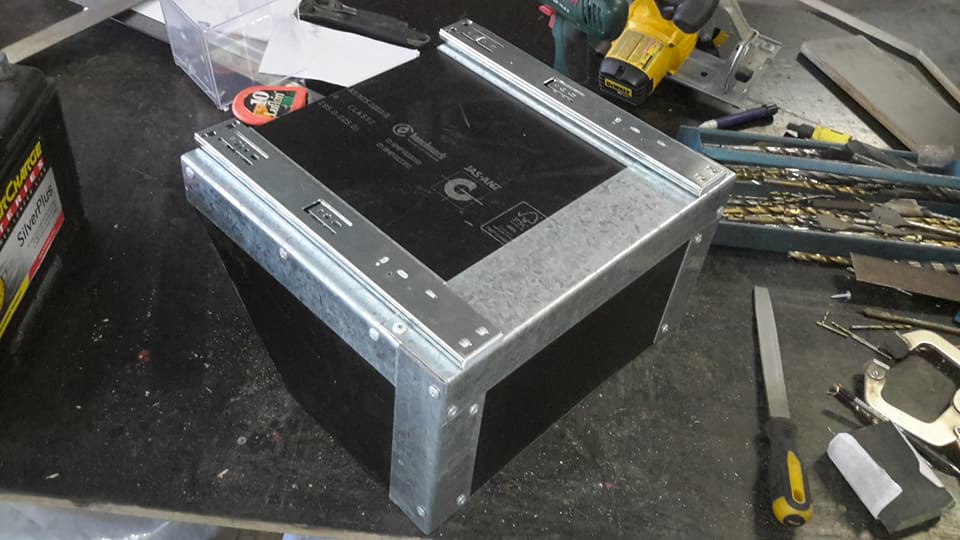
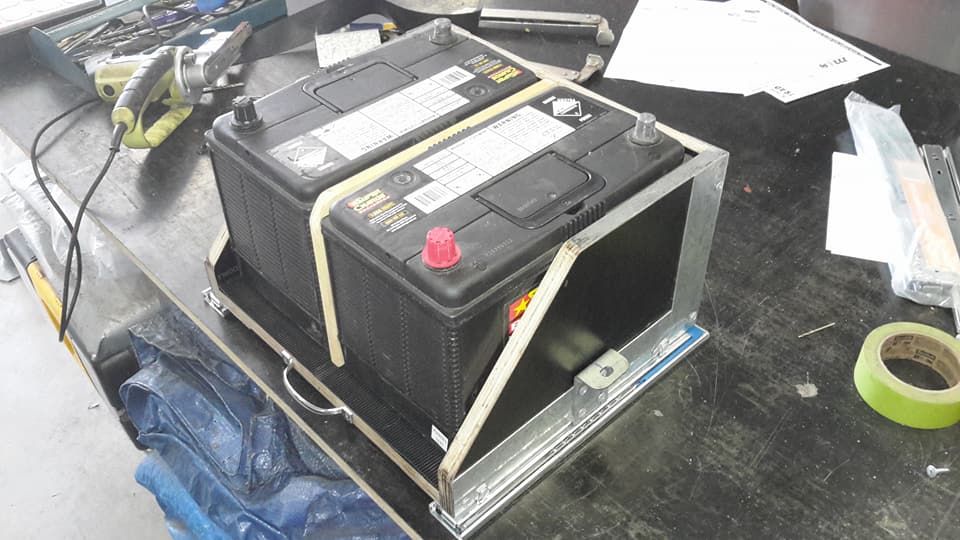
- I made up the battery carrier today.
- There is a little room front and sideways for variation in battery sizes.
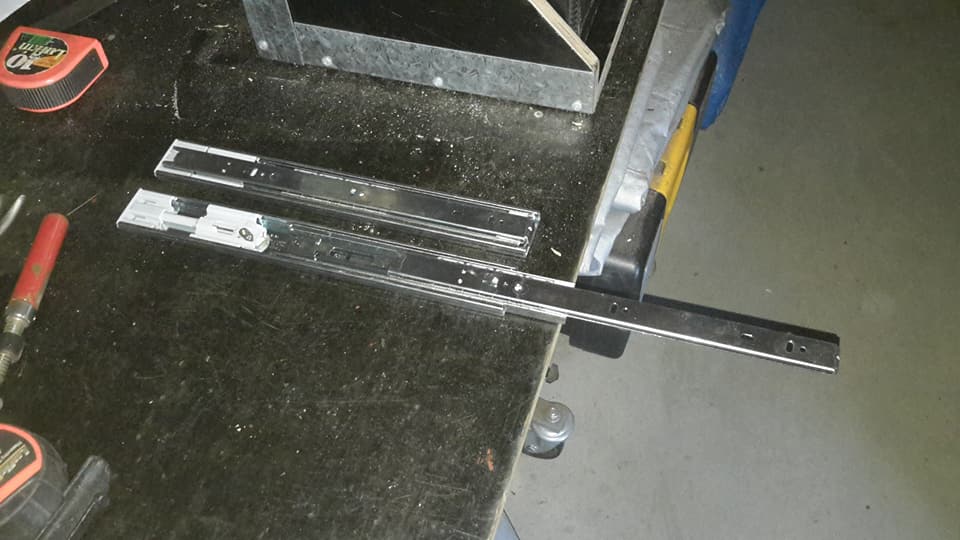
- I also got these sliding runners so no more getting on your knees and trying to get into that little confind area trying to lift these heavy batteries.
- I will just be able to slide them out a little and just pick them up.
- There will be a locking brace going from one side to the other in the middle there to clamp down the batteries.
- An adjustable clamp at the front that will have a little sideways movement and to lock them in position to stop them sliding forward.
- James Leonard Garrod
- Nice work!
- Greg Gibson
- Not to be rude or stick my nose in where it's not needed but those are side mount runners by the looks of the picture and are designed for side mounting with the ball bearings they will not slide properly if mounted underneath and will also bend and pop out the ball bearings and then they will separate and the whole battery box will fall out when fully extended
- Norman Julian
- Trust you to notice Greg. LOL. I have used them before on the flat and they worked quite well but I have my reservations with this because of the weight.
- If they fail I will get the proper ones. The other thing is they are not too long so fully extended they will only just come past the edge about 150mm so at least half will still be supported.
- Norman Julian
- I am having trouble finding a base mounting slide so I might make a side block on either side of this box and do it that way.
This site is hosted on
Fatcow  Unlimited Web Hosting |
Last updated Oct, 2017 |
This web site may contain Copyright material If you find any problems with the site, please email the Web Editor  |